
This is probably like the fifth article I’ve done on one of many actions using Apple’s Automator. If you haven’t made use of Automator yet, you’re probably missing out on a least a handful of actions that could save you a little time or streamline a few redundant tasks.
The following workflow has got to be the easiest one yet.
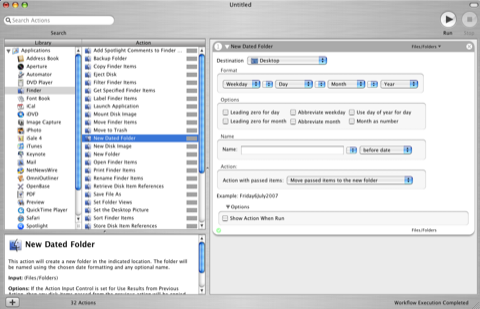
1. Open Automator
2. Click on Finder in the left column.
3. Scroll down in the second column until you find the action, New Dated Folder.
Drag the action over to the larger workflow pane.
4. Make any adjustments you like. Personally, I chose not to click the “Show Action When Run” under Options because I simply want the folder created with one less step.
5. Now drag and drop a file from your Finder on top of the action. Run the action to test and see if it’s performing the way want.
6. Now click the X on the upper right side of the file to delete it. Go to File>Save As Plug-in. Give it a name, like DatedFolder.
7. Now when you want to put one or more files in a dated folder, all you have to do is select them, right or Control click on them, and choose Automator from the contextual menu. Then select your saved action. A dated folder will be created with the contents you selected.
This action is a great way to clean up your desktop, providing to when the folder was created.
Leave a Reply
You must be logged in to post a comment.