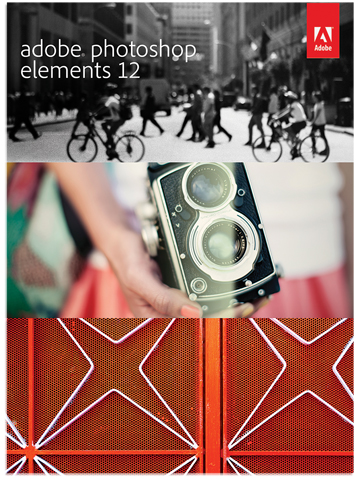
Adobe Photoshop Elements 12 for Mac
Company: Adobe
Price: $99.99 USD
Upgrade price: $79.00 USD
I have a tendency to take a lot of photographs, be it with my iPhone or with my digital camera. There are times when I go to review the pictures I’ve taken and for whatever reason; user error, lighting or equipment used, that the pictures just don’t seem to really depict what I actually saw and thought I was taking a picture of at the time. For those times, I make use of Photoshop Elements for Mac.
I know that I definitely could not afford to pay $700 for Photoshop itself. I’ve been using Photoshop Elements since version 1 came out back in 2001. I’ve gone through versions 1, 2, 3, 4, 6, 9 and have finally made the choice to update to version 12. Photoshop Elements 12, to be referred to as PSE 12, continues the tradition of being the more reasonably priced sibling of Adobe’s Photoshop line. The best thing about Photoshop Elements is that when the newest version is released, there is always something new added to the mix to improve upon the previous versions.
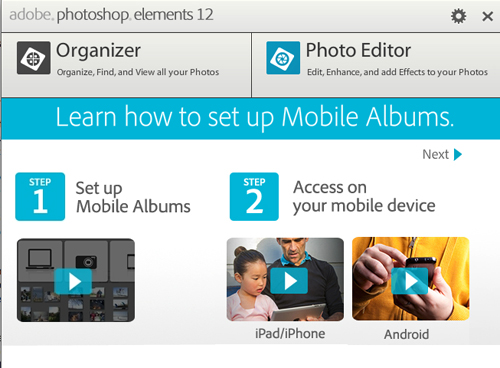
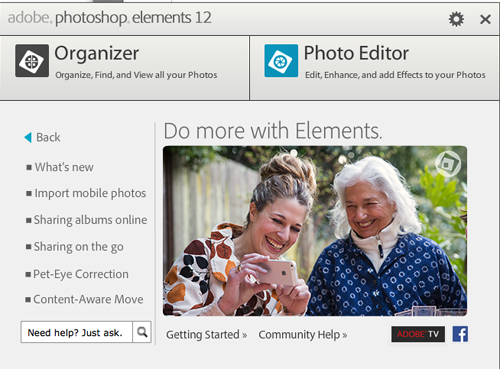
Upgrading to PSE 12 turned out to be a snap. Downloaded the software, clicked and it installed, and the installation went far faster than I remember when doing installs with previous versions with a CD or DVD. Once you’ve entered the registration code and opened up PSE 12, you are presented with a dialog window that offers you the choice of Organizer or Photo Editor plus basic tutorials on how to set up Mobile Albums and how-to-get started selections so if you are new to PSE 12, you can slowly work your way through the process of editing your photos.
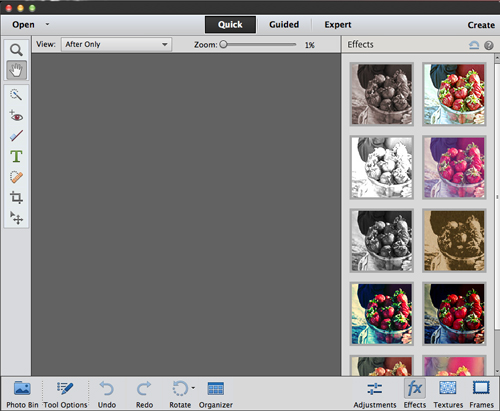
When you select Photo Editor and PSE 12 opens up to the work page, you will see three “tabs†at the top of the page: Quick, Guided and Expert. The normal position is Quick for when you want to tweak your photos without too much muss and fuss. The user is given several basic tools to work with that are positioned on the left side of the screen; Zoom, Hand, Quick Selection, Red Eye, Whiten Teeth, Horizontal Text Tool, Spot Healing, Crop and Move.
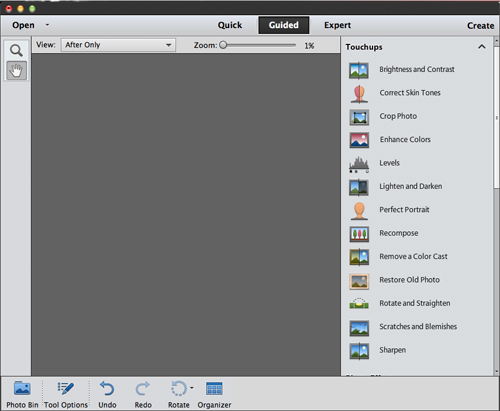
The next choice is Guided where the user is walked-through, as it were, the steps necessary to work on a photo to achieve a specific effect. The right side of the screen has a scrollable window that provides the user with different selections: Touch Ups, Photo Effects and Photo Play. Each section provides the user with a variety of different tools to work with on their photos. The nice thing about the Guided section is that you can quickly tweak your photo with a minimum of effort but you also learn by following the directions for each function. The ability to also view the Before and After action taken allows the user to see if that is what they wanted to do with the photo. Not bad at all.
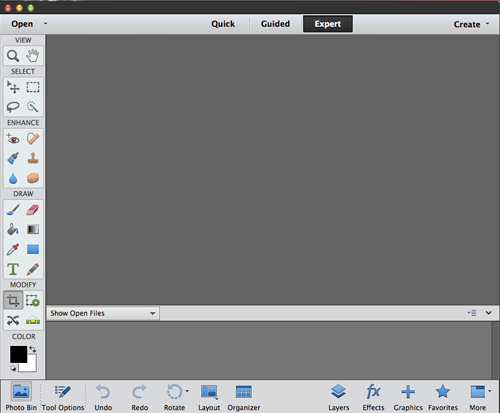
The final choice is Expert. This is where all tools are readily available on the left side of the screen. Users who may have used PSE in the past will tend to immediately go to this venue and work from there.
While we are talking about tools, let’s not forget the multitude of filters that come with PSE 12. Here’s a quick rundown of some of the filters that are available: Correct Camera Distortion, Adjustment filters, Artistic filters, Blur filters, Brush Stroke filters, Distort filters, Noise filters, Pixelate filters, Render filters, Sketch filters, Stylize filters, Texture filters, and Other filters where you can create your own effects. The Filter Gallery lets you apply filters all at once or apply individual filters more than one time. So you have the capability of having your photo, applying individual filters and then merge them all at once onto your photo. You’ve had the ability to correct red eye in previous versions of PSE, now you can also correct Pet Eye, that glow that makes your cat or dog look like something possessed straight out of a horror movie.
PSE 12 has added some new features to the application. Content-aware Move lets you reposition objects within your photo and the background will automatically be filled in. Auto Smart Tone, when you select it, provides recommendations based upon an algorithm or you can use the Enhance tool to move around the photo to see what the different adjustments will occur based on your selection. Enhanced Quick Edit mode lets you apply effects, texture and frames without having the background of being a Photoshop expert. Want to send some a greeting card? You now have the ability to print foldable card layouts with your own printer rather than having to send them out to an online service. Puzzle Effects Guided Edits lets you produce a photo that appears to have been put together as a puzzle with individual pieces. You can choose the size of the pieces and even shift some pieces so that it appears that the puzzle hasn’t been totally put together yet. There are still other new features that you can explore and use to your hearts content.
One of the major updates to PSE 12 is Mobile Sharing. Now you can have access to your photos from your iPad, Mac or iPhone through the new Mobile Albums. PSE 12 can now organize your photos by date in local albums and mobile albums. You can have similarly related photos automatically grouped together based on the time or where they were taken, so you now have a variety of options for keeping track of your pictures. Now to really make use of this you will have to sign up for an Adobe Revel account. Adobe provides free and unlimited access for the first 30 days; after that if you wish to continue using the free version you will be limited to 50 uploads a month. As with most other things, if you want unlimited use of the program to import as many photos as you want, you’ll have to purchase a Premium subscription for about $72 a year based on a monthly fee.
To give you an idea of what you can accomplish with PSE 12, I’ll give you a quick demonstration of one of Photo Effects that took all of two minutes, if that, to accomplish. The first photo shows a single yellow rose with the background foliage, taken in the late afternoon with my iPhone 5. The second photo shows the Zoom Burst Effect, focusing on the rose, blurring out the background foliage to draw your eyes to what is the best aspect of the photo. Not bad for a photo taken with an iPhone. Image what you can accomplish once you get your feet wet and start to experiment as you work your way through the filters and effects.
If you’re wondering whether PSE 12 is for you and you’re not sure that you can handle it, go to the PSE 12 website link at the top of the page, click on the FAQ link and explore the tutorials and videos that are available to peruse and to learn from. There are even links to books on Photoshop Elements. Check it out.
For the price, Photoshop Elements 12 is an extremely handy tool for those who are into photography, be it iPhone, smartphone, iPad or digital camera. If you are looking for a relatively modestly priced option, consider Photoshop Elements 12.
Specifications:
- 64-bit multicore Intel® processor
- Mac OS X v10.7 through v10.9 (Mavericks compatible)
- 2GB of RAM
- 4GB of available hard-disk space (additional free space required during installation)
- 1024 x 768 display resolution
- DVD-ROM drive (Downloadable version is available at the Adobe website (1.6 GB download) and other seller websites.
- QuickTime 7 software required for multimedia features
- Internet connection required for product activation*
*Adobe’s use of online services or third party online services dictates the use of an internet connection. (additional fees or subscription charges may apply)
All in all, based upon my use and its capabilities, I give the Adobe Photoshop Elements 12 a My Mac rating of 8 out of a possible 10.



Leave a Reply
You must be logged in to post a comment.