Presonus Revelator Condenser Microphone
Price: $179.95
PreSonus provided this product for the purpose of this review. Microphone and software tested on an Intel Mac Mini, Intel MacBook Air, and M1 Mac Mini.
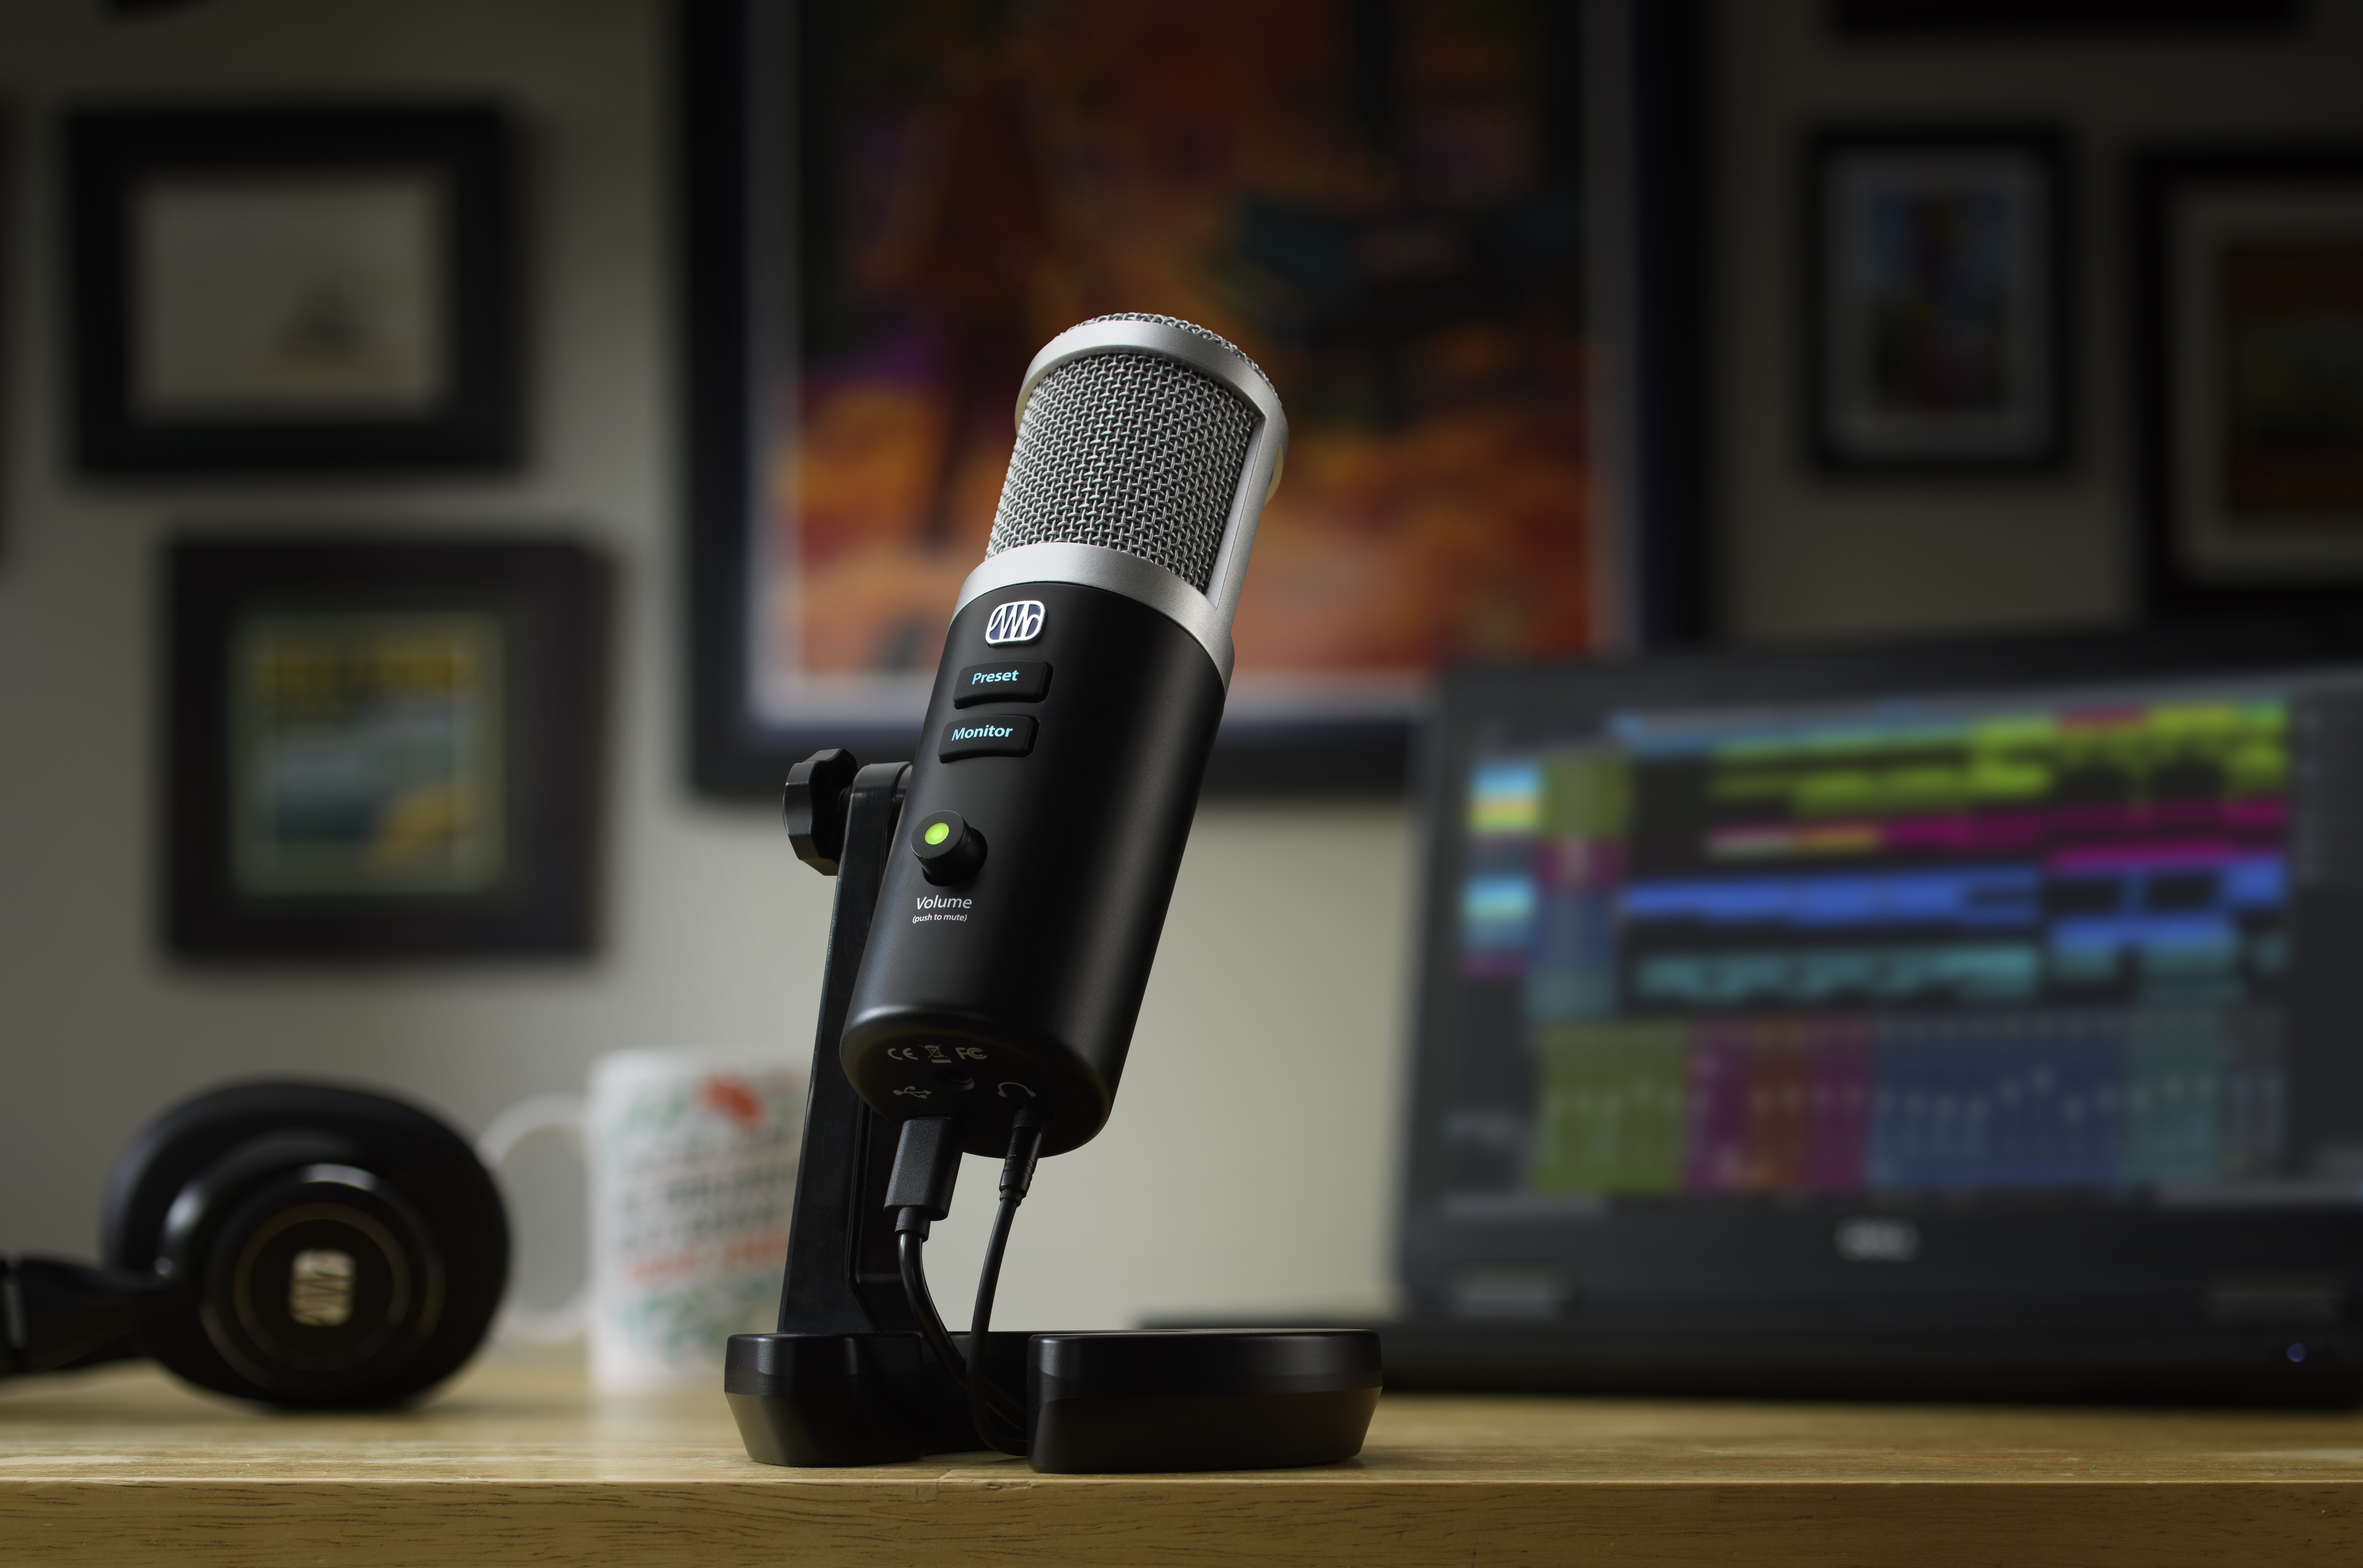
I own quite a few microphones, some might say too many, but with spoken word recording, everything begins with a microphone. Why bring this up? Because the PreSonus Revelator by PreSonus’s own product links ISN’T a microphone…even though it is. Sure, sure, when you go to the actual product page, it says microphone, but their links label it as an audio interface. Which it is too. Also it’s a mixer, with EQ settings, a noise gate, a compressor, a limiter, and it has a high pass filter as well. That’s a lot from one microphone. Before we go over the highlights of the microphone, what exactly comes in the box?
Naturally it comes with the Revelator microphone and a remarkably heavy desktop stand that only attaches (and can be removed) from the left side. If for some reason you don’t want to use the desktop stand, you can unscrew it from the base and use the stand adapter to attach it to any other desktop or boom arm you might prefer. A USB-C to USB-A cable, a stand adapter, and a few product sheets. Speaking of which, don’t discard the product sheets. It has the microphone’s serial number which you’ll need to register it with PreSonus. Why is that important? Because the microphone needs the controller software that you must download from PreSonus. Unless you’re buying it just for its looks…then you won’t need to.

After the Revelator is registered, you’ll get links to download the Universal Control software AND Studio One 5 Artist (free with the mic). There’s a bunch of instruments and loops that you can download as well, but if you’re just using the mic and Studio 1 for voice work you won’t need it. You can still get it if you want though, heck it’s also free.
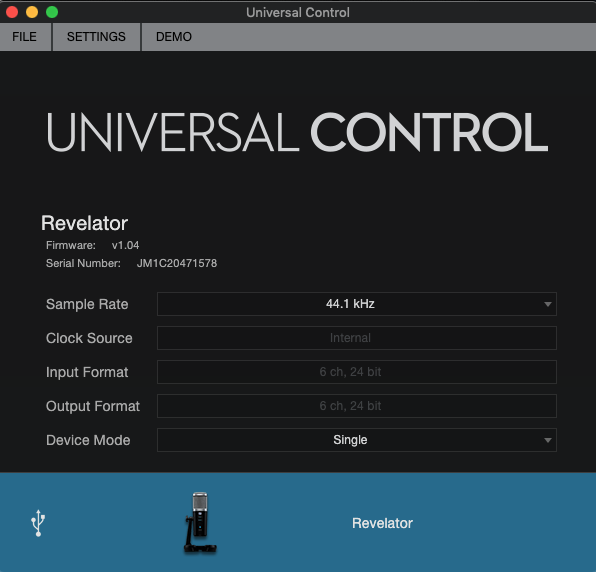
Once the Universal Control Software is downloaded, installed, and opened, a relatively simple looking control panel opens. Your choices here are somewhat limited with a hint of features to come that are grayed out. There are four sample rates (44.1, 48, 88.2, and 96kHz) and you can choose between either “Single” or “Multi” Device mode. However 44.1 and 48kHz are only available in Multi Mode while Single Mode allows for all four selections. Single and Multi Mode is where for me the confusion for this software begins. Want to record two (one for your mic and one for everything else) separate tracks in Garageband or other DAW? You choose Single Mode. If you want to assign different inputs from other audio programs (like a soundcart program or audio output from a browser) that other people (like on Skype or Zoom) can hear, you choose Multi Mode. However in Multi Mode you can’t output to different tracks in your DAW as you can only have a stereo mix. Why not have this be the reverse? Single Mode for a single stereo track out and Multi Mode for multitrack recording.

As an audio interface, it’s a little restricted. You can’t add any other hardware except for the the 3.5mm headphone port for zero latency monitoring. What you can add is other programs that accept audio inputs and outputs. So in theory if you have other audio hardware connected you possibly could add it in, but most Macs these days only accept it through USB. Since the Revelator is also a USB audio device, this might be an issue. The way you add other audio sources in (depending on if you’re in Single or Multi Mode) is by selecting as the software program’s output a “Revelator Source” (which depending on the Mode will either be “Revelator” or Loopback 1 or 2). For example in Skype, Zoom or most other VOIP services, you select the channel you want to output to and receive from, set up the output channel so all they hear is your mic (or other routed audio) and you’re good to go.
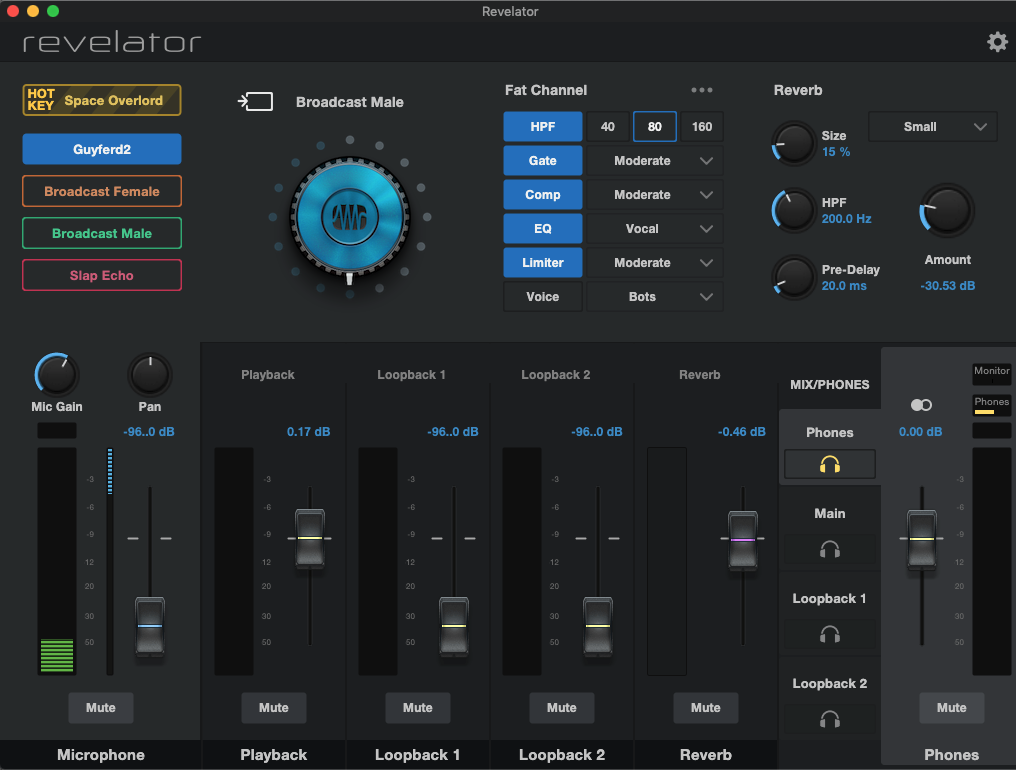
In Multi Mode, I was able to have Skype/Zoom in one Loopback device, a soundcart program in another Loopback device, and the Revelator microphone all going back and forth without any interference or feedback and have it all output to a stereo track with easily adjustable levels from within the Universal Control software. To be able to do all this from within the same interface that you’re controlling how the Microphone sounds is actually really cool…once you wrap your head around how everything operates. To describe how this all works would take an article all on its own, but there are some really great YouTube videos from PreSonus you can watch that can take you through the entire experience.

The upper part of the Universal Control software are the controls for the microphone and how it’s going to sound. You can have up to 16 presets with a few already pre-configured. You can create your own presets and assign them to one of the four available too. There are some simple controls for a High Pass Filter, a Noise Gate (which you very likely are going to need), a Compressor, an EQ, a Limiter, and some Basic Voice Filters. There’s also an entire Reverb section if you’re a fan of Reverb.

You can set some other basic parameters of the microphone here such as the Polar Pattern, some of the microphone external button voice presets, and whether you want the entire USB output affected by the settings in the Fat Channel. What is THAT exactly? This is where PreSonus gives you granular control over those Microphone settings I talked about a moment ago.

If you’re the kind of person who likes to dig deep into their audio settings, you’re going to like the Revelator’s Fat Channel. Not only can you do a deep dive into the controls for nearly all parameters of the microphone, you’re given 2-3 different ways to do it! Very cool.

To recap, from the Universal Control software, you can assign different audio programs to separate in and outs and adjust the volume of each. You can use simple controls to affect how the microphone sounds or dig deep into its Fat Channel and make a lot of manual adjustments. You change the polar pattern and how many presets you can choose directly from the microphone. I’d like to see a few changes made to the inputs and outputs since they’re identically named and that can lead to some confusion over what goes where, but PreSonus has some very clever software engineers that have done some amazing things with a tight, well integrated hardware-software solution.
Now after all that we get to the microphone. It’s a condenser microphone and is VERY SENSITIVE! Maybe a little too sensitive.If you aren’t in a well treated room for recording audio, you’re going to need all the tricks that PreSonus’s Universal Control software has to damp down any native background noise in your recording environment. It outputs to USB-C, a welcome choice, and has a zero latency headphone jack for monitoring directly. It also has some buttons that interact directly with the Universal Control software to include muting, adjusting monitoring levels between the microphone and audio from the computer, microphone gain, and selection of predetermined presets. Depending on the function desired, these buttons also change color as a visual guide. The Preset button on the microphone actually changes to the color on the microphone to match the color of preset in the software.
Remember when I said the microphone desk stand was heavy? It really really is and depending on your layout may position the Revelator too far from your mouth for good microphone technique. However PreSonus thought about that and not only gives you a way to remove the microphone from the stand, but supplies the necessary microphone stand adapter to make it fit in nearly any stand or arm that’s out there.
So what exactly do I think about the Revelator? The Universal Control software is pretty good and I look forward to the revisions that PreSonus will likely add in the future. Hopefully the Revelator won’t be the only microphone that will use this software as I’d love to try it on a dynamic (my preferred) microphone instead.
I give the software a solid 8 out of 10. It’s very useful and darn close to a great interface. The microphone I can only give a 7. It’s way too sensitive to be for regular use except in the quietest environments but the interaction with the Universal Control software is just amazing.


Leave a Reply
You must be logged in to post a comment.