Several listeners have asked me about how we record and edit The Essential Apple Podcast. I decided to give a bit of an overview of how I go about the process. Part of this article is based on a piece I posted on Medium in reply to another article on how to record a podcast.
There are dozens of different recording and editing applications available from the very basic to the extremely complex, (like Adobe Audition or AVID Pro Tools, for example) and there is no “right way†to do any of this. As is so often the case, you can choose from many paths and all of them have their own challenges – but in the the end they all take you to the same destination.
I use a Macintosh and all of my links are for the Mac or iOS platform. Some of the programs are cross platform, others are not. However I am sure a similar quantity of applications is available for both Windows, Linux or Android users.
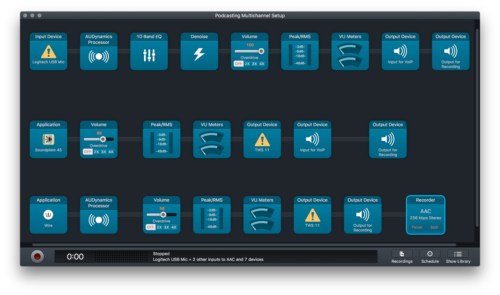
My setup starts with Loopback, which almost everyone needs on the Mac if you want multiple input and output routing, and which I use to create some “virtual†devices. Then I use Audio Hijack (AH) to control my microphone, soundboard and Wire output. Wire is an open source, end to end encrypted VoIP that we use in preference to Skype because it is more stable, less resource intensive and has a better sound quality in our experience.
I have 3 “lines†in AH, and I record externally using both Sound Studio and Piezo. This configuration is not actually necessary, and my set up is more complex than is strictly required, as I’ll explain later. If you don’t require a soundboard it’s way simpler still.
I use a very basic USB Logitech microphone. I know that I probably should move up to a better one, but as a beginner I don’t think you need to get too wrapped up in what microphone you use. At a push your iPhone EarPods with microphone will do the job, but if you want to make the biggest improvement for the smallest outlay a really basic microphone is your first port of call. As a starter I think something as basic as this or this would be a good choice. If you decide to get more serious you can always upgrade to a more “serious†microphone later.
My 3 AH “lines†are:Â
- my microphone, with various noise gates and EQ; this is then fed into Wire using a Loopback virtual device.
- Soundplant soundboard feeds to the same Loopback virtual device and thus inputs to Wire as well, so the guests and I can hear it.
- Wire, with its audio inputs muted, and some EQ, gain controls, and other sound modifiers.

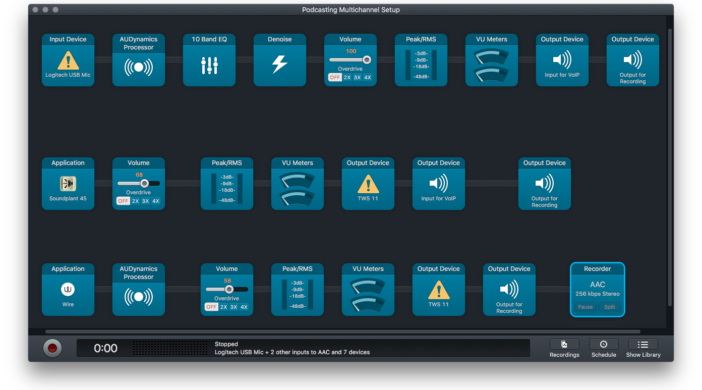
My three Audio Hijack “lines”
I do this so that I have two recordings in case something goes wrong with one of them. It also gives me a backup recording in case I do something stupid during the editing. Don’t laugh. It will happen to you one day too.
Alternatively to how I do it, you can get Audio Hijack to record your Wire output without muting its inputs and set it to give you a spilt recording (though you may have to merge your soundboard and mic first using Loopback to do that).
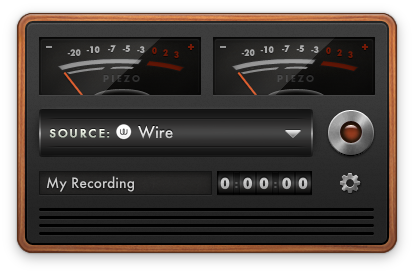
However, that’s all a bit over the top for most people. Far more simply you can use Wire (merging your microphone and soundboard if you use one before feeding Wire) — from here on in I’m going to assume you don’t require a soundboard. Then you can grab Wire in AH and record as described previously. For a REALLY easy if basic setup though, I recommend Piezo – use Wire and record it with Piezo (it will put your audio on one channel and the guests on the other) and it’s only $19 from Rogue Amoeba, the same company that develops Audio Hijack.
 Piezo
Piezo
Audio Hijack is an amazing tool, and I use it along with Wire for recording The Essential Apple Podcast. If you just want to record Wire, or any other app for that matter, and you don’t feel you need all the extra functions AH gives you then Piezo is an excellent app. Other methods are available — several podcasters I know use the web service Zencastr which is an excellent option for people who don’t want the hassle and technicality of recording themselves. Other excellent options for complete beginners are services like Opinion, Spreaker, Ferrite and many others on iOS. Spreaker’s recording app even comes with a built in basic soundboard.
Once the recording is finished there is usually a bit of editing required. Very few of us can record a podcast without the occasional cough, stumble, mistake, hesitant pauses or people talking over each other. You may also have things you wish to edit in “in post†such as intro music, outros, pre-recorded sections, adverts or whatever.
There is a vast array of options you can use, from basic to advanced. I use Audacity (which has the added benefit of being free and open source). In theory I could record directly with Audacity by feeding it my Loopback output, but my experiences doing that were less than ideal. That could be me doing it wrong because I am no expert. I have had to teach myself and figure it out by trial and error.
I haven’t been podcasting that long, and I started editing from “ground zero†with absolutely no experience. Some people really like Audacity and other people wouldn’t touch it with a barge pole. It works for me and I find that I can usually figure out how to get it to work. It supports a big range of Effects modules (including the Apple Core Audio ones).
Other popular Digital Audio Workstations (DAWs) include GarageBand, Sound Studio, Pro Tools, Traktion, Audition, and many more. Recently Ferrite, an excellent sound editor, released an iPad version. Several podcasters have switched to doing their editing with that. The secret is to find one that does what you need and works in a way you can understand and feel comfortable with. Many of the top DAWs expect that you have some experience in sound editing; I couldn’t come to grips with their complexity, or that they were total “overkill†for what I required of them.

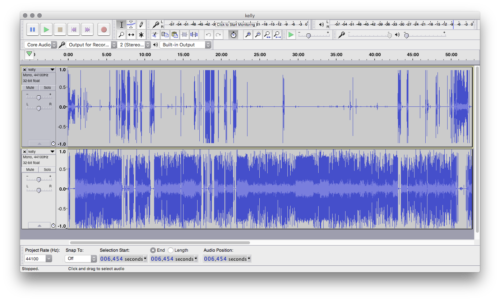
Audacity
The first step after importing my recording into Audacity is to split the stereo recording in to two mono tracks. This makes editing much easier. If you did a good job of recording then the volume levels on both tracks should be fairly evenly balanced. If not you can use a Compressor, Amplify or Normalise to try and get them somewhere close. When they are too far apart then next time you need to adjust your recording settings, but one or more of of the above filters can usually rescue all but the most diabolical of recordings.
These filters all work slightly differently. Compressor reduces the dynamic range between the peaks and the silence, amplify boosts or reduces the whole range, and normalise attempts to make all the selected tracks peak at the same level. If there is any background noise a noise reduction filter can remove some of it, although if you have used a good noise gate in your recordings you shouldn’t need to.
I then manually splice in any “post†pieces such as pre-recorded segments and network advertisements for other podcasts. One of the best features in Audacity is the Truncate Silence filter: you set a base “silence†level and minimum duration and set the desired maximum length of silence and it finds all the gaps and reduces them to the specified length. I find a floor of -45dB and a max duration of .15-.2 seconds works well. Finally I manually edit out any unwanted material, be it stumbles, Umms and Errs, noises, overtalking and the like. I usually play the recording back at about 1.5x speed and stop when I hear something I want to edit while I do this.
Lastly I export the recording to a mono .mp3 with a variable bitrate at a medium quality, because that is usually perfectly sufficient for a mostly talk podcast.
I am not saying this is the best way to do podcasting, nor is it the most efficient, but it works for me and it probably can be a method most beginners, like me, can get to grips with. I hope that this has been some help, although it is a field where there are so many choices it can be harder to make a choice than many would think possible, especially for the beginner.
Simon (aka Serenak)
Co-host of the Essential Apple Podcast


Leave a Reply
You must be logged in to post a comment.