Kodak Photo Printer Dock PD450W with WiFi – Review
Manufacturer: Kodak
MSRP: $149.90
Even in today’s increasingly mobile society sometimes it makes sense to have your photo memories printed on hard copy paper. The Kodak Photo Printer Dock is ready to fulfill the mission of printing images and giving them to loved ones in the moment and on site. Be it a family trip to the beach house, the next High School reunion, Thanksgiving Dinner, or through the woods to Grandma’s house. The printer, paper and power supply pack nicely into a small camera bag and make for a sturdy package of under four pounds including bag, ink and paper supply. The bag is not included but is readily available at big box or thrift stores or even garage sales.
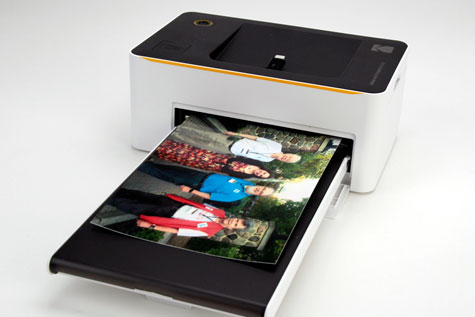
The Photo Dock produces a clear sharp 4†by 6†full bleed print in about 1.5 minutes. A package of glossy fingerprint and water resistant proprietary sheets of paper is packaged with a cartridge of dye sublimation ink. The cost per print of about 50¢ each is reasonable considering that these Kodak Moments are ready quickly and can be given to your guests before they leave the party. There is a One Touch button on the printer that will launch the Kodak application and print the selected image when you are ready to commit to paper. When printing, the paper passes out of the tray and out the rear of the printer then back through the printer to lay down the first color. This process is repeated four times, with three layers of color and then a final clear coating to preserve the image. Remember to leave eight inches of free space behind the printer. This is vital to prevent jams or mis-registration of the color layers.
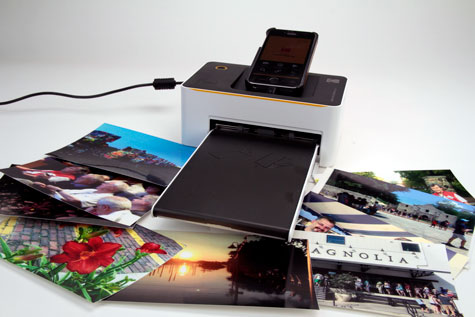
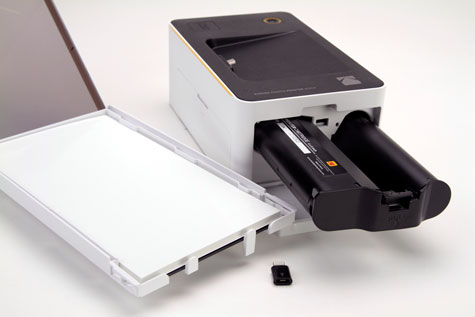
Preparing the printer for use is straightforward: connect the power supply, drop the paper in the tray and slide it into the front of the printer then slide the ink cartridge in the side. Power up and connect your image source. The freely downloadable application makes all of the connections possible. This app is easy to understand and contains a rudimentary set of editing controls that will provide many users will all of the tools that they will need before printing.
A problem arises when removing the spent ink cartridge out of the printer. I did this a couple of times and needed tools to pry the latch open to be able to slide the cartridge out. I reread the brief instructions multiple times and did not find an easy way to accomplish this task.
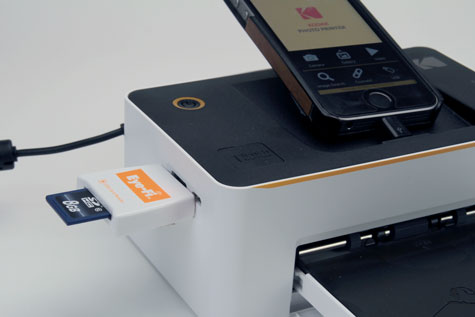
There are a variety of options to deliver the digital images to the printer. As the product name implies a smart phone can be docked with the printer. A built-in micro USB plug is ready for your non Apple phone. An included USB to Lightning adaptor is ready to dock and simultaneously charge your iPhone. However, in use my iPhone SE would annoyingly lose connection to the printer and need to be reconnected prior to printing. Other larger iPhones would make this connection even more tenuous.
A better option is to use the built-in WiFi. The ad hoc network created from your phone to the printer works well and it easy to set up. The only downside is that it temporarily prevents the phone from connecting to your regular network. This necessitates disconnecting from the printer network and reconnecting to your regular network at the end of a print session.
Another solution is to connect a thumb drive containing image files directly to the USB port on the side of the printer. The user manual has instructions on how to use the connection and manage the print jobs with the application resident on your phone. The controlling phone can be docked or connected via WiFi.
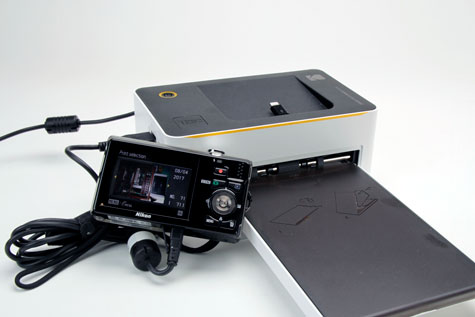
A PictBridge* enabled camera can be directly connected to the printer with a USB cable. The camera takes over and manages the selection and print commands. I have found that the PictBridge and USB Thumb Drive options work only when the steps outlined in the User Manual are followed precisely.
The printer was delivered to my mailbox. This box is a CBU* (Cluster Box Unit) provided by the U. S. Postal Service where it remained for three days. The summer sun here in the Sonoran Desert will turn this Postal Unit into a high temperature Easy-Bake Oven* easily exceeding 150° F. Upon testing all functions worked as advertised. This is a testament to the durability of the printer, ink and paper.
MyMac.com Review Rating: 7 out of 10
PictBridge: https://en.wikipedia.org/wiki/PictBridge
USPS CBU: https://about.usps.com/publications/pub265a/pub265a_006.htm
Easy-Bake Oven: https://en.wikipedia.org/wiki/Easy-Bake_Oven

Leave a Reply
You must be logged in to post a comment.