NEC EA245WMi 24†16 by 10 Monitor
NEC
U.S. $379.00. (Calibration system extra)
24†monitors are quite popular these days, offering enough pixels and resolution to provide excellent desktop real estate with great detail. Being in the market for a new monitor, my usual go-to places are Dell and Samsung, so when I learned about NEC monitors, something I knew very little about, I was quite happy to get a chance to try out a few. NEC sent me two monitors for review, and first up is the NEC EA245WMi 24†16 by 10 Monitor
With a maximum resolution of 1920×1200 @ 60hz., this is an IPS liquid crystal display (LCD), a screen technology for LCD displays designed to improve some of the limitations of standard LCDs, including viewing angle and low-quality color reproduction. (Thanks Wikipedia.) Also, IPS panels are not super expensive for the improved performance, so a high end monitor like this one is within most budgets, retailing for $379 on the NEC website.

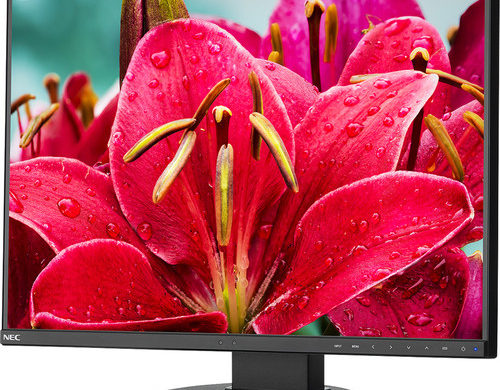
The unit is well-constructed, very sturdy, and thin in design. It has an incredibly small 6mm edge bezel (NEC calls them “ultra-narrowâ€) around the top, left and right sides of the display, so putting several monitors side by side offers a very small black space in between for a near continuous larger display. Along the bottom is a 16mm bezel with sensors, controls, and a blue power LED.
The display has a rated brightness of 300 cd/m² (the measure of brightness for a monitor in terms of how well the screen will show up in brightly lit conditions), which is average for newer monitors, but plenty bright for most inside office or home use. In use, I would say this value is underrated, as this monitor was considerably brighter than my own Samsung display with the same brightness spec.
Opening the Box
The monitor arrived well packed in a heavy-duty box with ample protection inside. There are a lot of “things†inside the box beside the monitor: A standard US three-prong power cord (no brick!), a USB-3 cable, a DisplayPort 1.2 cable, a 2.5 mm male to male ControlSync cable, a plastic cable tie adapter to help arrange cords, the display stand, and the usual set-up instructions. The user manual is available as a PDF on-line.
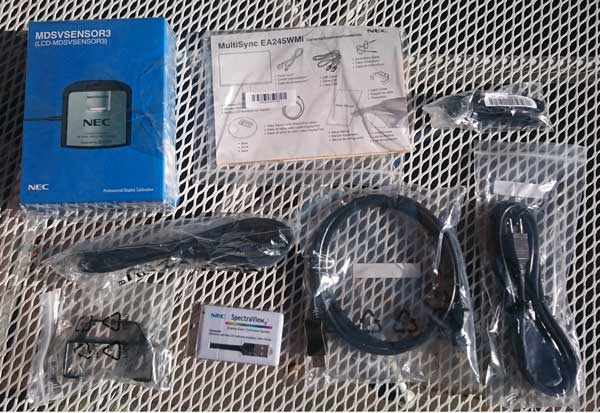
Optionally, or can be purchased as a package (but included with my trial) is NEC’s SpectraViewII Display Color Calibration software card, and NEC’s MDSVSENSOR3 display calibration sensor (there are several varieties of sensors available.) This is an extra cost option at $150 to $299 depending on the sensor, and can be part of a bundle as well. More on calibration later.
Setting Up

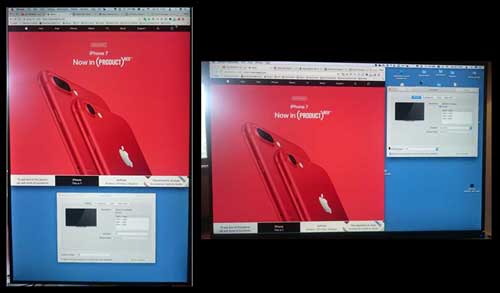
The monitor’s upright stand comes pre-installed, attached to a standard VESA mount, and attaching the base is simple. The monitor easily swivels between portrait and landscape mode, tilts forward 5 degrees, back about 30 degrees, and rotates on the base, about 45 degrees in each direction. The motions are tight with no play, feeling very solid. The stand’s small desktop footprint measuring 8†in diameter holds the monitor securely on the desk. Monitor dimensions, are 20.9†(531.5 mm) wide, 13.7†(347.8 mm) high, and 1.9†(47.6 mm) deep without stand. On the stand, the top of the monitor will rise 15.7†(397.6 mm) to 19.6†(497.6 mm) tall in landscape mode. Monitor depth is 48mm (under 2â€) at its thickest point.Along the front bottom of the screen are two sensors for power savings, ambient light and human detection, as well as forward facing, touch sensitive controls. I will point out that this is something that drives me crazy with my current monitor, which hides the controls along the bottom back edge, making it very difficult to not only reach them, but also know what you are pressing. And the touch sensitive controls respond well with a light touch and never seem to repeat or bounce.

There are a good number of connectors on the back of the display, and by rotating the display, they are fairly easy to get to. You will find a DVI-D input, an HDMI input, 2 in/out DisplayPort 1.2 inputs (for daisy chain applications), and a standard D-SUB VGA input. There is also a 3-port USB-3 hub built into the back, on the left side. Personally, I wish they there were along the bottom, as the idea of cables sticking out the side of a monitor bugs me.
Lastly, there is a stereo output jack, allowing you to use the HDMI or DisplayPort audio signal from the computer and send it to a pair of external speakers or headphones. If you use multiple sources for the monitor, your sound will switch when you input does as well. There is also a pair of ControlSync in/out connectors that allow one to connect together up to 25 MultiSync EA or EX Series monitors with the included ControlSync cable. Once done, the “master†monitor will share all settings changes and even its automation sensor controls with all the other monitors, so when you change the master, you change them all.
There are also small built-in stereo speakers, but these are nothing to write home about, and the sound comes out the back. You won’t be listening to music on these, but for simple web videos or Skype calls, these may be fine.
Connecting to the Mac
Connecting to my Windows PC was easy as it had DisplayPort 1.2 outputs, as well as HDMI and DVI connectors. But connecting to my MacBook Pro 13†(mid-2012) model was a bit more complex. First off, my MacBook Pro has a mini DisplayPort, so I needed an adapter. (You may have a Thunderbolt port, but you still need a display adapter!) I do own a mini DisplayPort to HDMI adapter, so I either need to find a standard HDMI cable, or get another adapter. (I opted to use my own HDMI cable, but DisplayPort 1.2 adapters can be had for under $10 on Amazon.) The DisplayPort adapter to HDMI cable to monitor worked beautifully. Well, once I set the monitor’s video level setting to “Expand.†Seems the default setting for HDMI cables is a TV color gamut and that was a problem for some settings and calibration later.
Plugging it and connecting it up caused the usual Mac display change flash to happen, but the monitor did nothing but turn the power lamp yellow. Patience here, the display should detect and switch automatically, and this seemed to take a little longer than expected.
The screen automatically came up in 1920 x 1200, and was bright and sharp, even at its 50% default brightness setting. At 100% brightness, I found it hard to look at. The display has a matte finish, so it may not appear as sharp as the Mac’s glossy display, but in my backlit environment (even with a window behind me) it showed no glare at all. If you are used to a retina display, you may notice the pixel dots if you get close enough. They are quite tiny (94 pixels per inch), but still noticeable to me next my retina display.
The overall size was a bit overwhelming at first since I am use to a 21†external display, but having all this desktop real estate was really fantastic. I also loved the taller 16×10 aspect ratio; the added height a welcome addition compared to today’s very wide, but less tall displays. The height while editing a document (like this one) or looking at web pages made the monitor much more useful to me.

Accessing the display menus was very easy with the touch sensitive front mounted controls. The menu’s on screen displays are amazingly easy to follow, not only displaying the menu you select, but also putting small labels above each monitor button so you know exactly what they do as well. This was especially welcome in a dark environment where the printed graphics on the monitor front were not visible. There are a great number of functions in these menus, and I will talk about a few later. Now, back to the first use, already in progress
Calibration
A Professional Display Calibration bundle was included in my test unit. This system includes a small credit card-sized USB drive, which contains the calibration software and license key, and a USB device for “Professional Display Calibration for Color Critical Professionals.†Did I really need this? In its out-of-box settings, this monitor looked great, so I was not sure why one would need this. But as long as it was here, I decided to try it out.
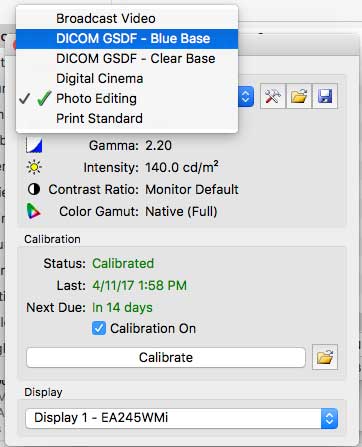
After installing the software, I tried a calibration, choosing “photo editing†from among the 6 calibration settings, including digital cinema, broadcast video, and print standard.
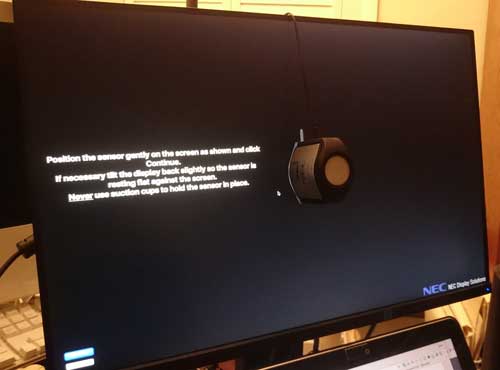
I launched the calibrator, which instructed me to connect and position the calibration device up to the screen. It then walked me through the calibration process. I hit a few bumps along the way, including not setting the display to full expanded color space (as mentioned above), but managed to get through a calibration in about 15 minutes.
Measured to the best of my ability (I am not a professional lab here) before calibration, contrast ratio was just below 1000:1, a little weak for a high-end monitor. Black levels are not as dark as I would expect, leading to the lower contrast ratio. I might have improved black levels with an adjustment to the back light control (Black Level), but then that would just reduce the high end as well, so better blacks, not better contrast ratio.
After calibration, the darks were changed very little, but the high-end output seemed to drop some, further reducing contrast ratio. That said, the color gamut was expanded some, and colors felt more natural, and both black and white levels looked good, and gray scale tracking was excellent.
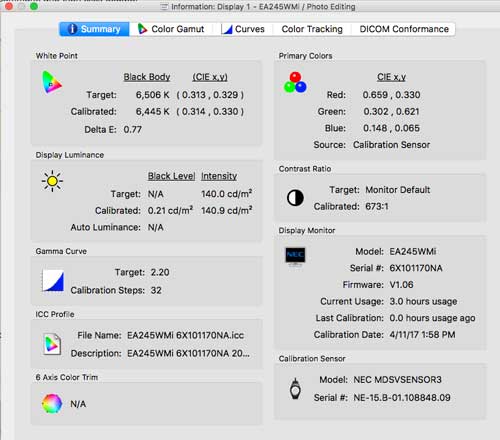
Calibration settings are saved in the monitor itself, passed to the monitor through the HDMI cable, or if filtered, a USB cable. And you can save a calibration for a number of different uses, such as photo editing, print standard, broadcast video, and digital cinema, among others. Switching calibration modes takes a short time as the software downloads the calibration data to the monitor.
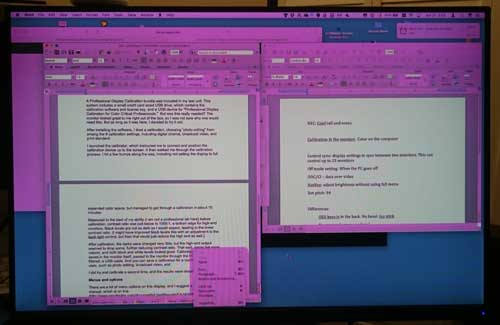
I did try and calibrate a second time, and the results were disastrous, adjusting the grays to pink while holding the whites correctly, and adding a pink tint to black. Several more tries did not correct this using either sensor I had. Obviously, something went wrong, so this can mess things up as well. But exactly what was not clear. It took a few more tries of deleting all settings, resetting the monitor to factory defaults, and trying again.
But, the jury is still out for me. While there was distinct color improvement, under most uses, I am not sure it mattered. Unless you are in the need for super color critical applications, I am not sure you need this expense. I found the default native setting of the monitor to work very well, with reasonable gray scale response bottom to top.
Menus and options
There are a lot of menu options on this display, and I suggest a look at the user manual, which is on line to see them all. But some of them are worth mentioning here:
 Under SETTINGS are Eco mode for power saving on brightness, auto off mode settings for shutting the display down when the computer goes to sleep, light sensing for auto brightness, and my favorite, human sensing. Human and light sensors, mounted in the front bottom edge of the monitor, automatically detect your work conditions and if anyone is in front of the monitor. They determine the proper display brightness and help conserve power. Human sensing will dim or turn off the display when you are no longer in front of it, which I found very cool. Once set to a few seconds, I would walk away from my computer, and the display would dim or turn off fairly quickly. But even more cool, when I returned and sat down, the display immediately lit up again (assuming the computer had not also gone to sleep.)
There are lots of color temperature settings (all adjustable), as well as a low blue light setting (non-adjustable), which is supposed to help you relax at night and sleep better. There is also a default for the display, and a program setting used by the calibration software.
I also liked the ECO INFO menu, which tells you how much power you are using and saving, including carbon savings (kg), carbon usage (kg), cost savings. There are menu items to input your average power cost (cost/kWh), the “carbon convert setting in kg/kWh, and your currency, and the monitor will let you know how well you are doing and how much it is costing you to use it.
Other
The monitor has been certified by TUVRheinland to be low in blue light content as well as flicker free. Not sure who this certification really is, but you can view them at the links above.
Conclusion
This is an excellent screen choice for most home and office uses, but response time (6 ms) is a bit on the slow side for serious gamers. NEC does not publish lag time but I did not notice any perceptible lag while using the monitor. For viewing documents, images, and videos, this screen worked wonderfully. Its wide viewing angle and extra height were both welcome features, and the automatic sensing and power savings are a great addition as well. And in color critical applications, the calibration system worked [mostly] well. For the price, I can highly recommend this monitor.
There Are a Few Cons
The built in speakers are small, not great, and the sound comes out the back.
Unfortunately, several times while using the display the menu buttons became completely unresponsive. I could not even power it off and had to power cycle to get them to respond.
Automatic input switching is a bit slow as well and can be annoying. This is problematic if a computer requires the monitor to be there right at boot time.
I also would have liked the stand to go a bit higher so I could easily put a computer in front of it. With the monitor sensors at the bottom, often my 13†MacBook Pro would block the sensors unless I put the monitor on a phone book.
MyMac.com Rating: 4 out of 5

Leave a Reply
You must be logged in to post a comment.