Lantronix xPrintServer Office
Price: $200
Company: Lantronix
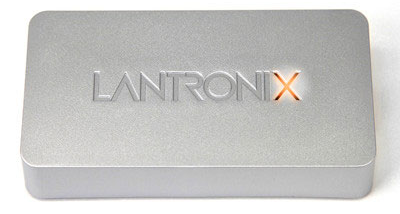 With all the mobile devices surrounding us, the need to print documents is lower than what it used to be, as we can read on our device. But printing is still required, and sometimes you may want to print directly from your mobile device. Here is the issue: is your printer compatible with mobile and wireless printing? If not, the Lantronix xPrintServer Office may be what you’re looking for.
With the Lantronix xPrintServer Office, you can take almost every printer available on the market and transform it into an Air Print or Google Cloud Print device. The device is very small and easy to install. It has a USB port, a LAN port, and a plug for the power adaptor. Once plugged into your network, the device will discover network enabled printers. You can find a list of compatible printers here. If your printer is USB only, you can use the USB port of the xPrintServer Office to make it network ready (if the printer model is supported).
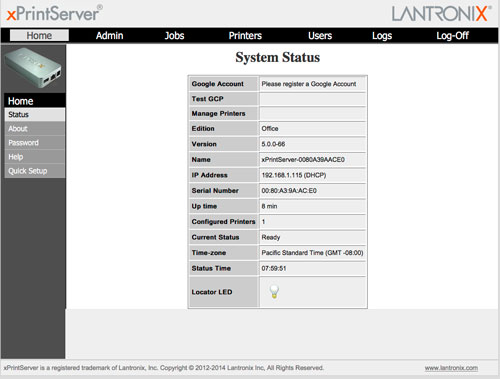
 The initial configuration of the device is straightforward. Connect it to an Ethernet port of your LAN, connect your USB printer if you have one, then connect the power to it and let it boot. Once booted, it will be reachable on your network with a web browser to the IP address it obtained from the DHCP server.
The question you ask: how do I know which IP address it has? There are a few easy ways to find out, with no need to be a network expert. From a mobile device, you can scan the QR code on the back of the device to reach its web page. You can also enter the following URL in any browser, http://www.findmyxps.com, fill-in the serial number of your xPrintServer Office and click Lookup then you will be automatically directed to your device. Login with the default Admin account, and you’re ready to begin.
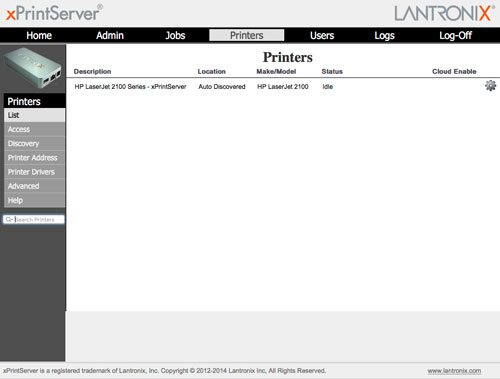
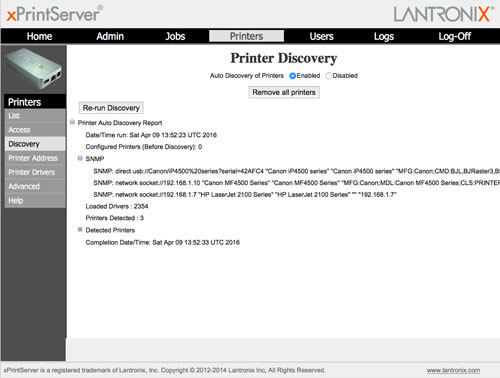
If your printer is compatible with the xPrintServer Office it should have been auto-discovered and added to the Printers tab of the web interface. In my case I have three printers in my house: an HP LaserJet 2100 with an HP JetDirect Ethernet module, a Canon Pixma iP4500 (USB only) and a Canon ImageCLASS MF4570dn (USB and Ethernet). Of my three printers, only the HP was auto discovered and added to the printer list. My two other printers were discovered and appeared in the Discovery submenu.
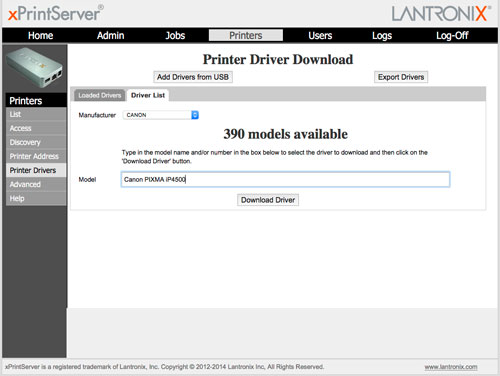
If your printer is not automatically configured, you may be able to add it manually to the xPrintServer Office. I went to the Printer Drivers submenu off the Printers tab, selected Canon for the Manufacturer and typed iP4500 in the model name. It offered to add the Canon PIXMA iP4500 driver, which I added by clicking Download Driver. To add the printer to the List submenu, I simply got into the Discovery and clicked the Re-run Discovery button, and the Canon PIXMA iP4500 appeared as Auto Discovered. That was nice!
I tried the same with the last printer, the Canon MF4570dn, but could not find any drivers for it. I browsed to the Advanced submenu and clicked Manually Add Printer in hope of being able to add it manually, but nothing worked. I contacted Lantronix support about this, and they told me that this model of printer is not supported. Strangely, it is the most modern printer in my house, with Bonjour support, but according to Lantronix it uses a printer language that cannot be supported. They referred me to a link on the Open Printing web site. In other words, Lantronix is using the Open Printing software to operate its magic.
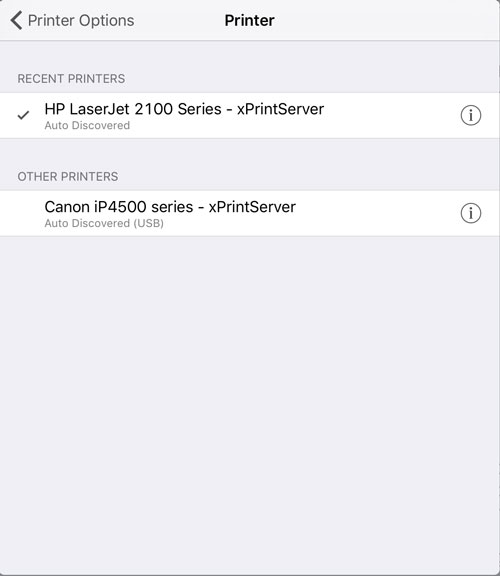
Once you have passed the initial configuration above, you are ready to print from any iOS device. Go into an application you’d like to print a page from, tap the share icon, and in the Printer section you’ll see your xPrintServer Office configured printers appeared in the list. In the xPrintServer Office web interface, you can browse to the Jobs menu and you’ll see all active or completed print jobs. If your printer supports color printing, such as my PIXMA iP4500, printing in color requires no additional configuration on iOS or the xPrintServer Office.
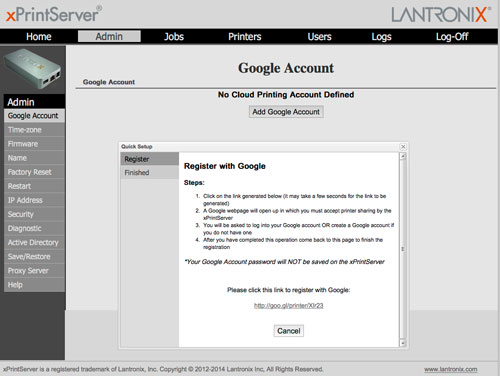
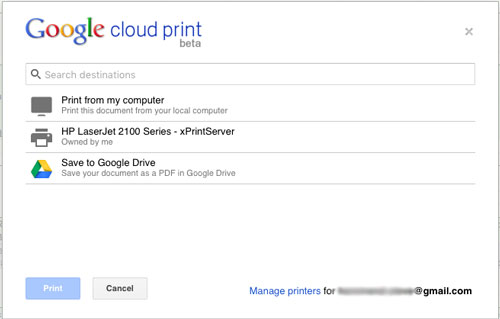
In addition to iOS Air Print compatibility, the xPrintServer Office is also compatible with Android and Google Cloud Print service. To configure it, go to the Admin tab under the Google Account and click the Add Google Account button. A window will appear with a link to click. Follow the very simple instructions, and in a few minutes you’ll be ready to print your Google or Android documents. I do not have an Android device to test, but I tested it from the Google Docs interface, and it worked as expected. Just go to File/Print in any Google Docs documents, when asked, select your printer and you’re done. Printing from Google Cloud Print can take a few moments, so be patient.
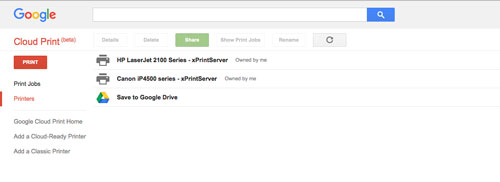
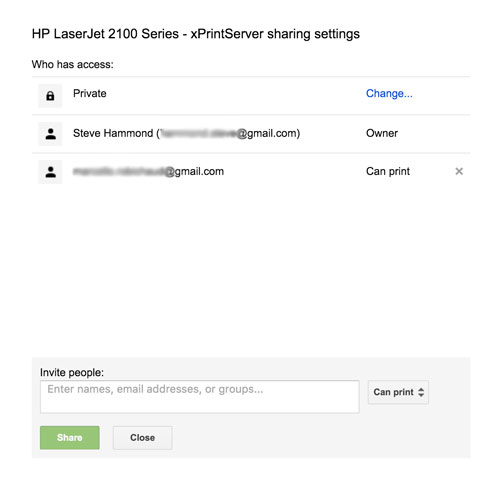
If you need to share the printers configured on a specific xPrintServer Office with multiple users, log-in to your Google account that was initially used to enable Google Cloud Print on the Lantronix print server at this URL: https://www.google.com/cloudprint. Select the printer you want to share, and click the Share button. A dialog will appear where you can add people you want to share the printer with. You can select if they can print only or print and manage the printer. From now on, that person will have access to the xPrintServer Office configured printers from Android or Google Docs. It is a bit more involved than what you’ll get on iOS, due to the way Google implemented their Cloud Print services, but it works just fine.
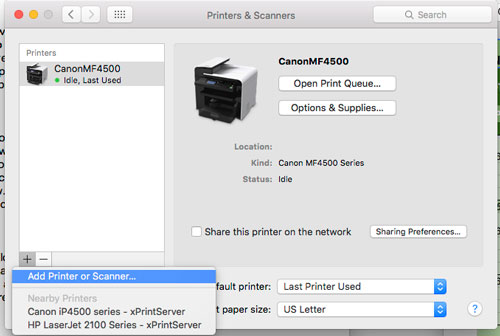
In addition to being a great print server for your mobile devices, it can also be used as a print server for your computers. It uses the Bonjour protocol, which makes it convenient on a Mac. Just head up to System Preferences in the Printers and Scanners applet and click on the plus (+) button. You will see the list of printers you have configured in the web interface of the xPrintServer Office.
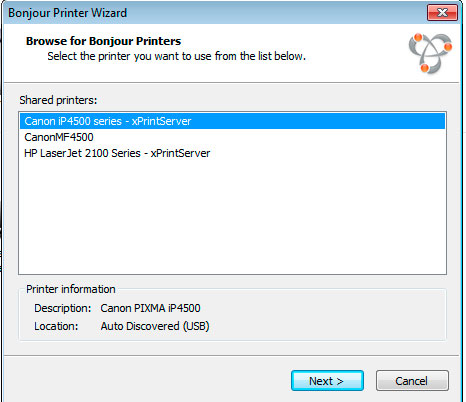
On certain versions of Windows, you may have to install Bonjour for Windows first. Then, launch the Bonjour Printer Wizard application, and the Lantronix configured printers will appear in the dialog box.
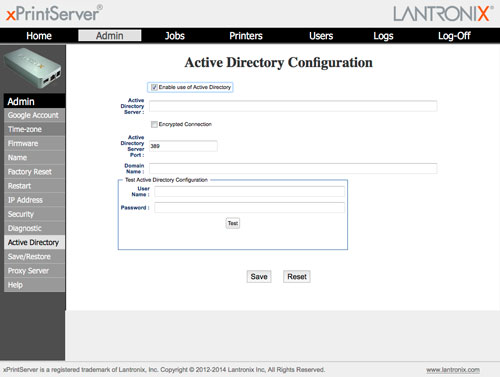
In an office environment, there are a few other features you can look at. For example, in the Admin menu you can enable the use of Active Directory, a Windows server feature for user services and authentication. I have not tested this feature as I do not have Windows server running in my environment. In the Users menu, you can create accounts for people in your enterprise to manage the print queues in the Jobs menu, but users cannot change the configuration or add printers, only the Admin account can.
If your enterprise has a network with multiple IP zones using routers and firewalls, you do not need to buy one xPrintServer Office per sub-network. You can add the printers’ IP address manually in the Printers Address submenu. As long as the xPrintServer Office can reach the printers (via routers and firewalls properly configured), it can configure them. For IT services it means the xPrintServer Office can be installed in a server room in a rack with the provided mounting bracket out of physical reach of users and thieves. Lantronix says in their documentation that they can support an unlimited number of network printers and up to eight USB connected printers using a USB hub.
Overall, it is an impressive device for its size. Instead of shopping for new printers or replacing printers you already have around to supports mobile users, the xPrintServer Office can enable wireless printing at a very low cost. Before buying, make sure your printers are supported, and if they are, you won’t find a better deal to add AirPrint and Google Cloud Print to your existing park of printers. Configuring it may be more involved than what you see in their ad on YouTube, but it’s worth the effort.
MyMac Review Rating: 8 out of 10


Leave a Reply
You must be logged in to post a comment.