SpyderCAPTURE Pro
Price: $399.00
Company: DataColor
Photography is an art, and in art colors matter. Say you are taking product shots in a controlled lighting environment. There are tools that can help you gather the right color information while you shoot. If your workflow requires this, you may want to take a look at the SpyderCAPTURE Pro from DataColor.
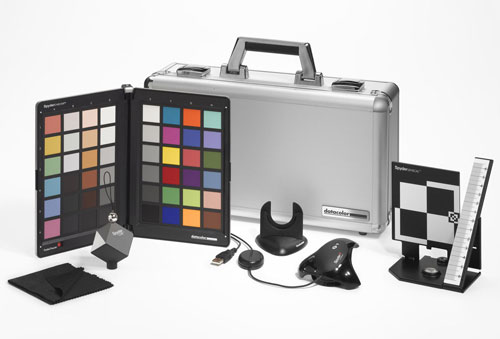
The kit is a bundle of four accessories (that can be bought separately): the SpyderCHECKR, the SpyderCUBE, the SpyderLENSCAL, and the Spyder4ELITE.
All items are sold together in a solid aluminum case. Each piece is stored in a fitted foam interior that makes it easy to transport. When opening the case, we see that all items offer a good and solid build. The SpyderCHECKR can be closed like a book, making sure the colors don’t fade by being exposed to light when not needed. The SpyderCUBE comes with a lanyard and pouch to carry it. The kit only includes quick start manuals, but full PDF manual can be downloaded on the DataColor web site.
The SpyderCHECKR is a color pallet composed of 48 different colors displayed in a rectangular shape. To use it, you first need to take a picture of with your camera and import it into your image editing software. Lightroom, Adobe Camera Raw (ACR), and Hasselblad’s Phocus are supported, but Apple’s Aperture is not. Once imported, there are a few manual steps to do in your image editing program to adjust the color pallet. I won’t explain it all in this review, but it is well explained in the online user manual that is freely available here.
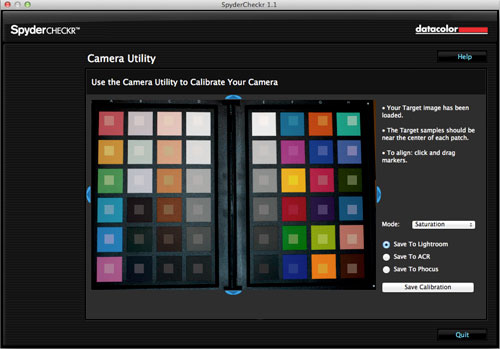
The SpyderCHECKR comes with software, available for Mac and Windows, to install on you computer. Once you make all the required changes in your image editing software, you export the file to the SpyderCHECKR Application. As shown in the image below, each patch should match the overlay square placed by the application. Once you are satisfied, you can export the result from the SpyderCHECKR Application as a preset for Lightroom, ACR, or Phocus.
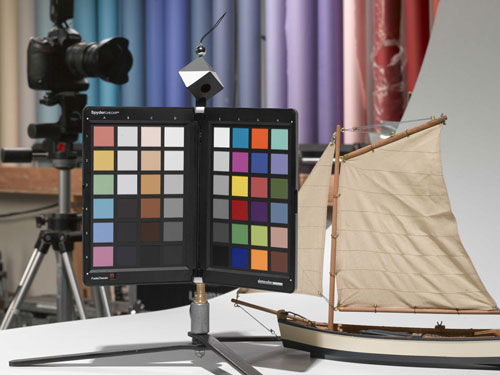
The second tool that comes in the kit is the SpyderCUBE. It is designed to be used facing the camera so that you have a top left-right white and gray target, with the bottom showing the black side, where a hole (named the Black Trap) is located. When you have the SpyderCUBE in one of your images, you can use it in your image editing software and adjust the white balance using the gray face, the highlights with the white face, the shadows using the black face and the Black Trap to adjust the black. On top of the cube is a small aluminum sphere that can help you visualized the reflection of the light in your image (they called it the specular highlight).
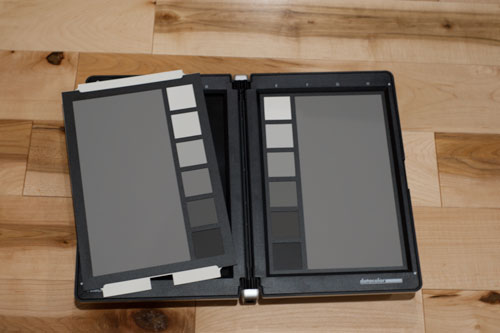
The SpyderCUBE can replace any gray card you have been using in the past in such situation. It can also be attached to the top of the SpyderCHECKR so you can use it to help the color balance process of the SpyderCHECKR. The SpyderCUBE is relatively small (approximatively 1.25 inches square) making it not usable in some situations such as when the subject or target is far away from the camera. In those situations, you can use the SpyderCHECKR secret feature for the white balance. Not obvious to the eyes, the SpyderCHECKR cards can be reversed and will offer you a large 50% gray target along with small square or neutral colors.
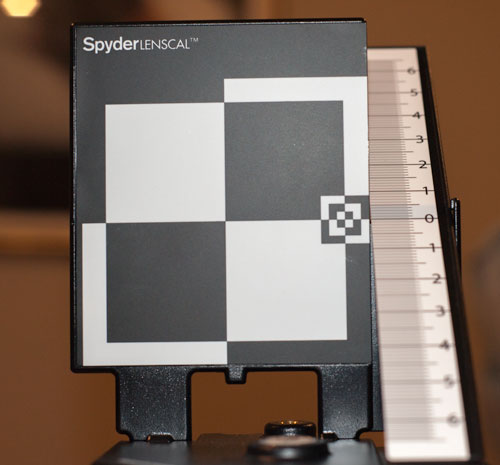
The other item included in the kit to calibrate the camera has less to do with colors, but more with the autofocus mechanism (AF). The SpyderLENSCAL is a target with a ruler that you shoot with your camera. Again, I won’t go into all the details on how it works, as the more curious can read the full manual online. Basically, if your camera has a lens calibration menu (on my Nikon D700 it is named AF fine tune) and you suspect that the AF is out of focus with a specific lens, you can adjust the focusing mechanism to be more accurate. This will prevent bad focuses, and in the end will give you more good shots. I must add that it is very subjective to your eyes.
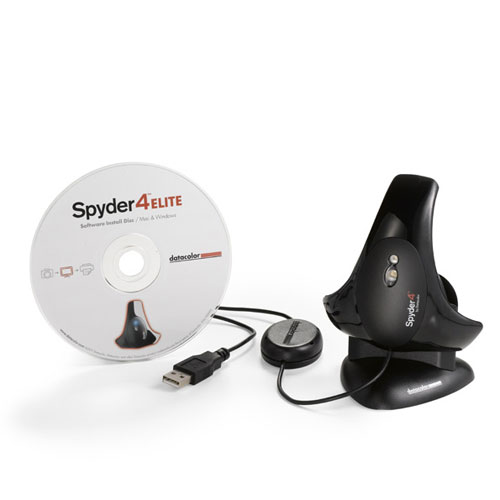
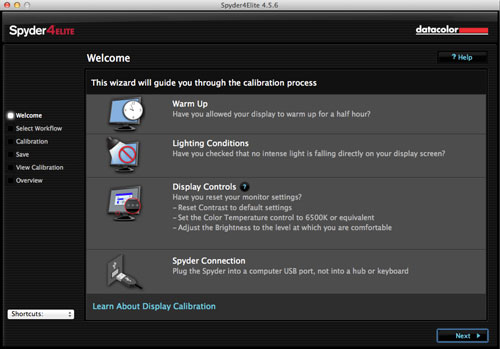
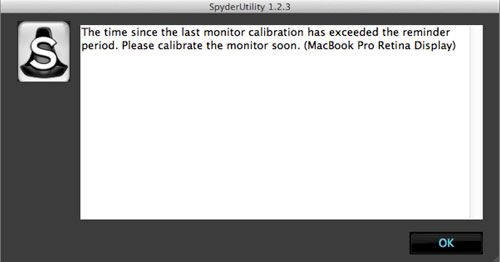
The last item in the kit is the Spyder4ELITE. What does it serve to calibrate your camera if your editing display is not calibrated? The Spyder4ELITE is a screen calibrating tool that will help you get more accurate colors on your screen. I tested it on my MacBook Pro with retina display, which comes factory calibrated from Apple. Even if a display is factory calibrated it does not mean it will stay that way forever: heat and other factors will allow the calibration to slip eventually.
The Spyder4ELITE is there to help you maintain that near perfect calibration for when you need to work in a color workflow that is very sensitive. For example, if you are hired to do products shots, the color of that object in front of you may be of utmost importance. By combining the Spyder4ELITE with the SpyderCHECKR and the SpyderCUBE, you aim at targeting that perfect colors editing workflow. This will help your photo editing by adjusting one image for basic parameters (such as exposure, white balance, etc.) and sync those changes to the other pictures you took in that same session.
In my testing, I found that the Spyder4ELITE helped in setting the MacBook Pro with retina display screen at a slightly better color accuracy. It is, once again, very subjective and I did not see a 50% better color performance from my screen. At best, it helped by a few percentage points of color accuracy. It also helps to maintain your screen brightness, when connected to your computer, as the ambient light changes in your editing room. Keep in mind that it won’t make a cheap office display one you can use for photography work: the screen must have a minimum quality to be calibrated. For more information on monitor calibration, you can read this article.
Getting and maintaining a perfect color workflow is a daily task, if required by your specific photography work. Many photographers won’t need to use the SpyderCAPTURE Pro on a daily basis. In a light controlled environment, the SpyderCAPTURE Pro will ensure you have color and standard lighting parameters be identical, and will save you work in the editing process. But each shooting situation will require recalibration. Even a single shooting session can require small changes here and there.
For instance, say you are shooting school graduation students from 8 a.m. to 5 p.m. in a room where you have lighting equipment (flashes) and exterior lighting (bay windows) combined. If you capture your lighting condition at 9 a.m., when your first student is coming in, and don’t do it again by noon, when the sun sits high in the sky, it is more than probable that the exposure may be slightly different. At 1 p.m. when you start your afternoon session, you decide to take another snapshot of your lighting condition. But when you finish your last student at 4:30 p.m. and the sun has moved away from the windows, your lighting condition has changed again. On the other side, if you use the SpyderCHECKR gray card for each student, you do not simplify your editing process in the end. It is all about using the tools with judgment.
I like what the SpyderCAPTURE Pro kit can provide to a photographer that requires perfect color and lighting control. But like many things in life, it may be overkill for many photography tasks. If you work in a very specific and controlled environment, the SpyderCAPTURE Pro can be a very useful set for you. But keep in mind that it will require some time for you to fully master it. It requires you to be involved at each photo session if you want to save on editing at the end.
MyMac Review Rating: 7 out of 10

Leave a Reply
You must be logged in to post a comment.