HDR Expose 2
Price: $149.00 US
Company: Unified Color
32 Float V2
Price: $99.00 US
Company: Unified Colour
HDR photography has made its mark in recent years among many photographers and enthusiasts. The technique has become very popular and many software producers offer solutions to create HDR images. I had the opportunity to review two products from Unified Color: HDR Expose 2 and 32 Float V2.
Before I begin this review, I’d like to mention a few things. I’m very interested in HDR photography, but I do not consider myself an expert. I have many things to learn on the subject and this review was part of my exploration process. Unified Color has created very good tutorial videos you can find  on their web site. For that reason, I won’t describe how to use the software, but my experiences using them and how I consider them as an end user.
There are not many differences between HDR Expose 2 and 32 Float v2. The first one is an application that can be used independently or as an export plugin for Aperture and Lightroom, while the second is an Adobe Photoshop plugin. To simplify the wording, in this review I will refer to HDR Expose 2 in general, since 32 float V2 is basically identical, and I will indicate specific features when necessary.
My previous experiences with HDR photography were done using the built-in HDR Pro feature included in Adobe Photoshop since CS5. While the functionality is correct for basic HDR photo, it is far from a specialized HDR software. For example, when you merge multiple exposures in HDR Pro, you have the choice of merging in 8 bit, 16 bit and 32 bit. In the 8 or 16 bit, there are many sliders (and presets) you can play with to adjust the resulting image. But if you want to get the full spectrum and use the 32 bit mode, you only have the Set White Point slider.
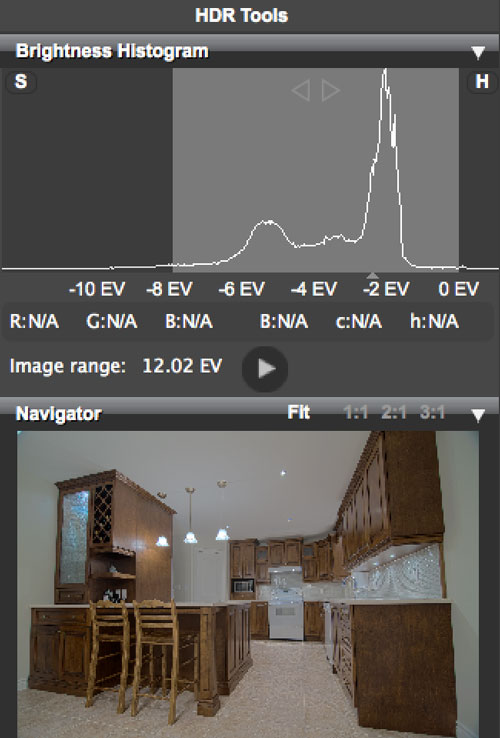
In HDR Expose 2, you are working exclusively in 32 bit mode. Unified Color uses a custom technology they call Beyond RGB. The premise is simple: the software works with all the spectrum of colors and details available in the image while processing the HDR, and the file is compressed to a lower bit rate only at the end of the process (when you export to TIFF or JPEG format).
This means you are working with a 32 bit histogram in HDR Expose 2. That histogram is an important part to tone mapping your image in HDR Expose 2. In fact, you should have your eyes on it most of the time. Because there is no way a display can let you see all of the 32 bit spectrum, the part of the histogram that is displayed on the screen is represented by the lighter grey area. You goal is to make as much of the important part of the histogram appear in the light grey area. You can move that light grey area to see what you are missing, but this doesn’t affect the tone mapping settings.
From using it on quite a few pictures of my house interior, I found the integrated presets to do a very nice job overall. Trying to trick them manually using all the sliders and tools available is somehow challenging. Sometimes a very small change results in a global tone map that does not fit well in the image I was working on. In other words, there is a small learning curve to use this software as intended. But if you are successful at creating a tone map you like, you can add it in your presets list.
HDR Expose 2 is great at creating a realistic image from multiple exposures. I think that is really where United Color is heading with this software. If you are looking at making surrealistic images or images “out of this world” this is probably not for you. Not that the software cannot do it, but it offers no such presets by default, and you may succeed doing so by using a 16 bit mode in Photoshop alone.
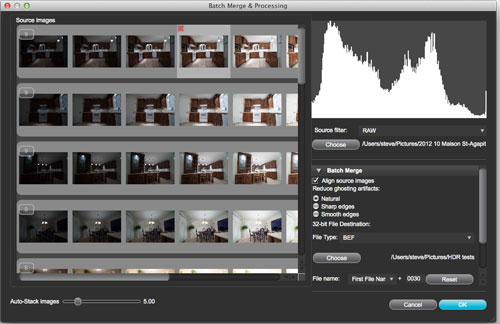
HDR Expose 2 (the full software version) offers a batch mode, which is not available in the Photoshop plugin. I had mixed results with it, as it sometimes gave me images that had merging issues. The demos in the tutorials video worked fine, so maybe that had to do with my images. When I processed a single set of exposures manually with the same images, the problem was not there. It could simply be because I had many exposures of the same scene in that folder, but I have not investigated further on the subject.
The Adobe Photoshop plugin 32 Float v2 works by using the photo merged with the HDR Pro feature (you need to set to 32 bit). From there, you open the Filter menu and select the plugin from the menu items. One of the limitations I found to the plugin, is that it cannot be used on a Smart Object. In other words, if you want to redo the tone mapping, you have to start from the initial merged images again.
Overall, HDR Expose 2 and 32 Float v2 are great HDR solutions that come with a learning curve. Unified Color offers a bundle for the two applications for $199, a $50 savings over buying them separately. If the batch functions are of no use to you and you already possess Photoshop CS5 and higher, 32 Float v2 has the same functionalities and great results found in HDR Expose 2.
MyMac Review Rating: 7 out of 10


Leave a Reply
You must be logged in to post a comment.