Nemo’s Ten Point Tutorial Number 11
Photoshop CS5 Workflow for Beginners — #1 — Off-color holiday food under glass
When taking a photograph indoors where light is artificial and inaccurate to the eye, don’t worry about in-camera color balance unless you know what you are doing. Available light photos are easier to improve via Photoshop CS5 than images made using a flash.
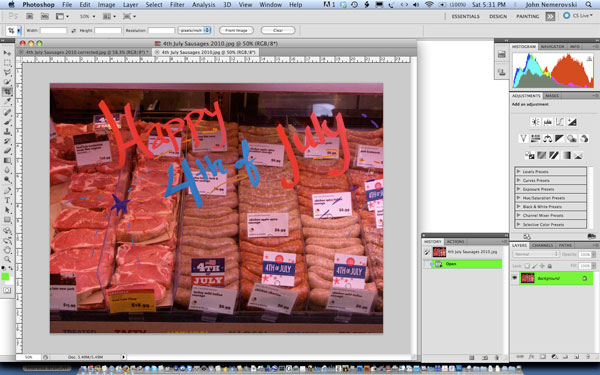
Below is my original JPG taken full frame with a steady hand inside a high end grocery store. I liked the bizarre irony of the subject matter and the linear chaos of the composition. I wanted to include the butcher’s hand reaching for some chicken apple spice sausages, but he wouldn’t cooperate, and I didn’t want to get thrown out of the store.
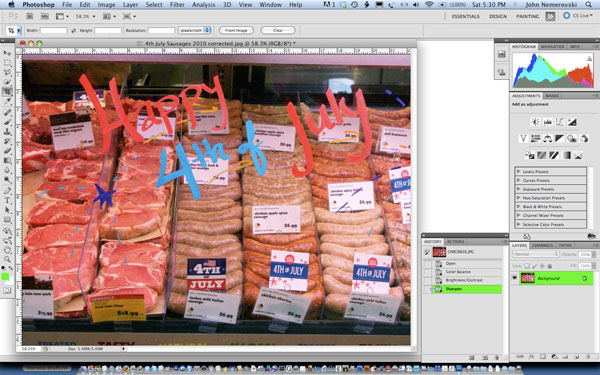
Next is the workflow I used to improve the off-color image. These steps are primarily for beginners new to professional Photoshop CS5, or people familiar with Photoshop Elements. Experienced Photoshop users will have more refined workflows, but their images may not be superior at the end of the process.
1. After importing your camera JPGs into iPhoto (ask me if you don’t yet know how to do this), click-hold-drag an original iPhoto picture over the PS icon in your Dock to (wait ten to twenty seconds) launch Photoshop CS5 with your photo displayed in the workspace.
2. In the upper right of your Photoshop CS5 screen click on the double >> workspace selector and chose Photography. We will learn more about workspaces in future tutorials. Make sure your History palette is open: Window / History. I place my History palette lower right, but you can place yours anywhere you like.
3. File / Save As, then give your working image a new name, such as: 4th July Sausages 2010.
4. For Where, choose Desktop, so you can find the darn photo later.
5. For Format, choose JPG, then SAVE, and click OK in the JPEG Options window after making sure the quality is 12, which is the maximum.
6. View / Fit on Screen.
7. Choose Image / Adjustments / Color Balance. To improve my reddish sausage picture, I slid CYAN to the left (-43), MAGENTA to the right (+9), and kept YELLOW at 0. Your numbers will always be different, image to image. Then click OK.
8. Image / Adjustments / Brightness/Contrast. Experienced Photoshop users will give me a hard time about using Brightness/Contrast, but it is much improved from earlier versions of Photoshop. The sausage photo required BRIGHTNESS (+32) and CONTRAST (+28). Again, every photo will have a different set of numbers. Click OK.
9. Filter / Sharpen / Sharpen. Here Photoshop veterans will disagree, but one unit of Sharpening is often a gentle tweak in the right direction for recreational photographs.
10. File / Save As, and add a word to the title, so you can easily tell which JPG is your original and which has been enhanced. “Corrected” or “Edited” or “v2” are some suggested words to use. Click SAVE, and click OK, and look on your Desktop for both your original and improved photos. In future tutorials we’ll discuss where and how to relocate all Photoshop images. For now, simply make a new folder on your Desktop: File / New Folder. Give this folder a name you will recognize, such as Photoshop Images.
Suggestions are welcome for additional beginner and intermediate tutorials for Adobe’s powerful new Photoshop CS5.


Leave a Reply
You must be logged in to post a comment.