If you haven’t noticed yet, each of Apple’s main creative suite applications including iMovie, iDVD, Address Book, Keynote, Pages, Numbers, and now, Mail’s Stationery feature, includes a photo browser whereby you can access photos stored and managed in your iPhoto and Aperture libraries. This means that if you’re sending an email, creating a DVD slide show, editing a video movie, creating a postcard or newsletter letter layout in Pages, or putting together a spreadsheet in which you need photos or images, you can now access your images directly from the program you’re working in.
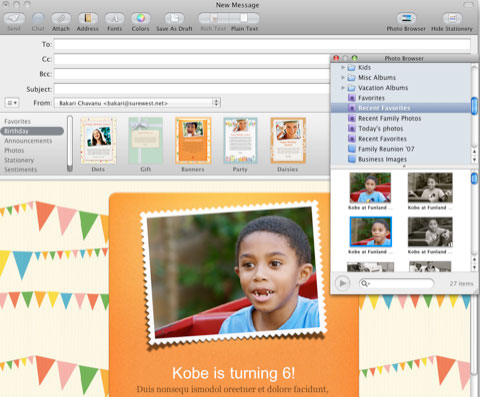
You no longer have to open up iPhoto or Apple’s more professional photo editor and management tool, Aperture 1.5 in order to access your photos and images. This media browser makes for a significant time saver, especially for photographers.
But suppose you want to access your iPhoto or Aperture photos while working in applications that don’t feature this nifty browser? Well, again, Apple’s Automator, comes to the rescue. Using Automator, you can easily create a photo browser that you can access anywhere in the Finder.
Here are the steps:
1. Open up Automator
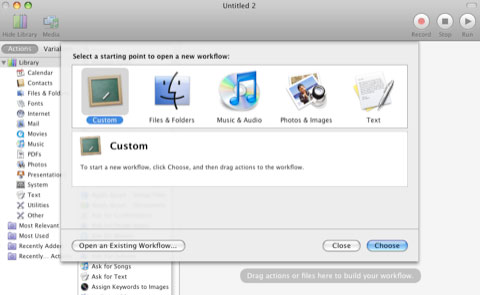
2. If you’re Automator 2.0 (which comes with Leopard) you will be prompted starting point for a new workflow. Choose Custom.
3. In left column of Automators browser, choose Photos under Library. Next, in the middle column, select Ask for Photos, which is the fifth workflow down in the list.
4. Drag that workflow into the main window of Automator. Notice also the description of the workflow under the first two columns.
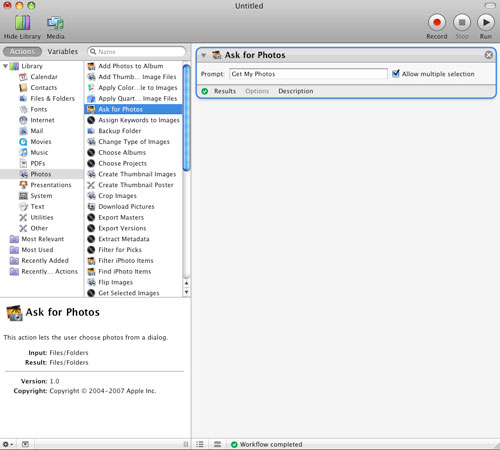
5. Where it says, Prompt, type something “Get My Photos†or whatever you like.
6. Now go to File>Save As. There are two ways you might to access and run this workflow. Save it as a Finder if would like Control or right click your mouse and choose Get My Photos from the context menu. You could save it in Script Menu where it can be access and ran from your Scripts menu that you set up in your menu bar. You also save the workflow as an Application by clicking on File>Save As. You will probably want to save the workflow in your Applications’ folder, and then drag it to your Dock for easy access.
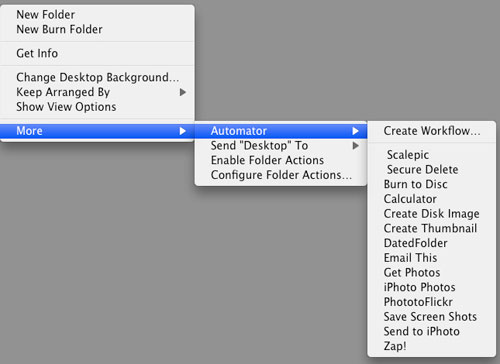
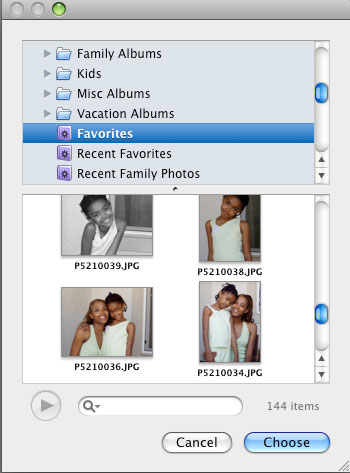
7. Now simply click on the saved workflow and the action will run, bringing up a browser of your managed photos in iPhoto and Aperture, if you have one or both of them installed. When you click and drag one of the photos from the browser, you get the full resolution size to use and resize as you wish.

Leave a Reply
You must be logged in to post a comment.