Since MyMac.com Podcast 93 we learned a new world – Ubuntu. I thought I quickly let you all in on how you can testdrive Ubuntu Linux without installing a single file on your computer.
First of all let’s talk about Ubuntu. According to the Ubuntu Website the name means “humanity to others”.
It is a free, open source operating system based on Debian Linux and a release coming out every six month. Every release will be supported for 18 months to come, so it adds a bit of reliability to your Linux experience.
The development team of Ubuntu states that their main goal is ease of use and a good selection of server and desktop software that makes for a comfortable desktop experience. Ubuntu ships with the Gnome desktop environment.
I personally don’t like Gnome, so I shall focus on Kubuntu here. It is pretty much the same, just with the KDE desktop environment.
Ubuntu, while having all these grand goals is a commercial company funded by millionaire Mark Shuttleworth. Mark made is dough with the sale of Verisign in 1995 and has had a few fun projects since, one of them was a 2002 flight to the international space station.
Commercial, but it is free? The ultimate goal for the guys there is to create a operating system that will be of interest to corporations and corporations will be interested in support contracts. Still Mark’s cash keeps the project developing forward and in my opinion it is one of the most promising distributions out there today.
OK, I want to get started… let’s Download
First you need to download Kubuntu from one of the mirror servers, go to the download page http://www.kubuntu.org/download.php and select the country closest to you. I downloaded my image from the Free University in Berlin, but you might just want to go to the University of Minnesota http://ubuntu-releases.cs.umn.edu//kubuntu/6.06/ and click the Mac (PowerPC) desktop CD link. It should work on G3, G4, and G5 computers, including iBooks and PowerBooks.
If you plan of running Kubuntu on your system, please have lots of RAM . We are not going to install anything, thus everything that does happen will come off the CD and thus will reside in your RAM. In this one case, more is indeed better. 512MB will see the system run quite nicely on a MacMini.
Once you are done downloading you’ll have a nearly 700MB large ISO File on your computer, write it to CD:
It’s very easy with Toast, but you can just as well use Disk Utility to do the job as follows:
1. Launch Disk Utility (Applications > Utilities > Disk Utility)
2. Drag the ISO to the sidebar of the Disk Utility main window.
3. Select the ISO where you just dragged it, and choose (Menu > Image > Burn…)
4. Insert a blank CD > Burn.
Start the Testdrive
Insert the CD, click on Apple and select to Restart your Mac. Once your computer starts to boot again hold down the “C” key on your keyboard. If that doesn’t work, find out what key or key combination will boot your Mac from CD.
After a few seconds with lots of activity from your CD drive, you should see a welcome screen with lots of information. You will want to read it, but if it is all too exciting and you just want to get started go to the boot-prompt and type “live” (without the quotes) and hit enter. This will get Kubuntu to really start.


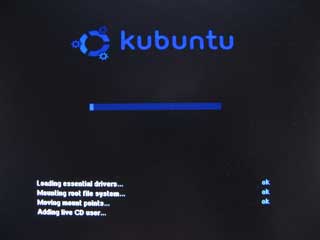
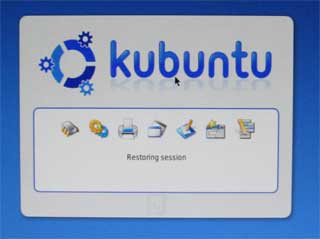
You will see the above two boot screens one after the other. The first is initializing much of the basic system, the second is KDE getting ready to serve you. This boot process will take much longer than booting Mac OS, this is not an inherit slowness with Linux, but common whenever you try to boot just about anything from CD. So be patient and on older Macs go and have a cup of coffee.
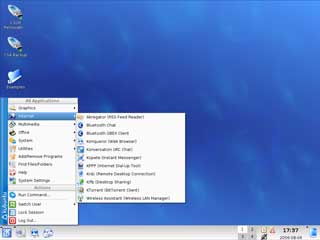
When it is all done, you will see a clean desktop, which should have recognized and mounted your hard-drives, USB-Memory-Sticks, etc and that everyone who ever used a Windows based computer will feel right at home. You can’t deny that our friends at KDE are marketing their desktop environment to Windows converts.
Gnome will make us all feel a bit more at home with the menu at the top of the screen, reminding me a bit more of Mac OS, but I never really came to like it, that’s why I always go for KDE.
Anyway, there is a “Start-Menu” button on the bottom left and some quick start buttons. To the right you will see four little squares numbers 1 to 4, these are virtual desktops – something really useful and then it goes on with other notifications and date and time.

And now it really is time for you to play around. Don’t worry, nothing bad will happen to your system, unless you click the Install icon and actually go through with it. I would recommend that while it is OK to read from your hard-drive don’t write back to it. Use a USB Memory Stick for convenience and if something was to happen, it is only the memory stick that needs reformatting…
This release of Ubuntu (Dapper Drake) has impressed me a lot. It was much faster to boot than earlier releases, it had a much better hard-ware recognition (even recognizing that Bluetooth module in my MacMini).
It is ready to use the internet, and while your wireless LAN might be supported, you’d have to set it up. To spare yourself the trouble, use an ethernet cable and you are good to go.
So why?
I don’t think there is any reason to use Linux on your Mac unless you are just curious what all that Linux hype is about. And that is a fairly good reason, in my humble opinion.
Kubuntu, or Ubuntu for that matter, are great releases, as the developers truly focused on you the user and rather than throw in several dozen programs, they kept it to the bare minimum, including multimedia tools, graphic tools (including a nifty screen capture utility), and OpenOffice for your office needs. It is a good first look at Linux and I would go as far as recommend this release to anyone, who wants to go cold-turkey and switch to Linux. But who would want to? We all have a really cool Unix based operating system already 😉
Should you however feel daring and be interested in installing it full time, click the install icon and follow the instructions. Don’t worry about the few programs that came with the CD. Kubunut/Ubuntu being Debian based means that there are some 16,000+ programs out there that you could use, all you need to do is find and download them…
When you are ready to come back to a more familiar Mac OS X…
Click on the K-Start-Menu in the bottom left hand corner and select Log Out.. then select to either reboot or shut down completely. Give Kubuntu a bit of time to shut down, it will tell you in quite some detail what it is doing. Things like shutting down CUPS, closing the network connections, etc. When Kubunut is through with shutting down, it will eject the CD for you and ask you to press ENTER. Your computer will switch off or reboot.
Interested / Want to know more?
Visit the Ubuntu Project at: http://www.ubuntu.com/
Visit the Kubuntu Project at: http://www.kubuntu.org/
Lastly
While it should be perfectly harmless to go through with the above, let me just tell you: If you do it, you are on your own. I have used Live CDs frequently and never had a problem, but you should always make sure to have a backup available… ALWAYS! Don’t come complaining to either me or anyone here, we told ya 😉
Editors note: you can watch the Intel Ubuntu build running on a MacBook Pro at this link.

Leave a Reply
You must be logged in to post a comment.