All the buzz lately has been about iLife ’06 and iWeb. iWeb is a great tool for making websites, and I use it myself, but before iWeb there was Homepage. Homepage was, and still is, part of .Mac. If you have a .Mac account you can easily use Homepage to make a variety of webpages. I’m going to discuss making a photo album today.
First, you need a .Mac account. If you don’t have one, you can still read this article. You’ll see how easy Homepage is to use, and you might want to get .Mac. You’ll also need a folder of photos. Check out Macspiration 16 for directions on exporting photos from iPhoto. Instead of exporting to a CD (as described in this article), you want to export your photos to a folder. Give your folder a distinct name also.
You have your .Mac account, and you have your photos. You now need to connect to iDisk, which is where your personal .Mac files are stored. To do this go to the Go menu in the finder. Choose “iDisk.†Next, choose “My iDisk.â€
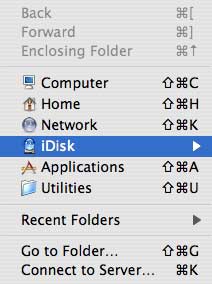

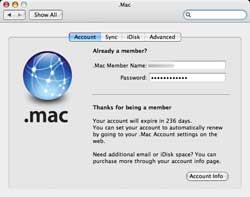
If you don’t have your .Mac username and password stored in the .Mac system preferences, you will be asked to login to .Mac. If you do have them stored, your iDisk folder will open.
Your iDisk folder will look like this:
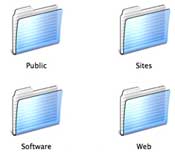
There are a lot of different folders in your iDisk folder. I’ll talk about some of them at a later date. For the purposes of this article, you want to open the “Pictures†folder. Once that folder is open, you want to find the folder you made with the photos in it. Drag and drop this entire folder into the “Pictures†folder.
A progress bar will now display on your screen. Once this bar disappears, the photos have been copied to your iDisk and you are ready to make your album. The amount of time this takes will depend on the amount of photos your are transferring, the quality of the photos, and the speed of your internet connection. This is not recommended for dial-up connections.

Next, open your favorite web browser and go to the address www.mac.com. Click “Homepage†under the .Mac tab at the top.

You will then be asked to login using your .Mac username and password. After logging in, you will be presented with the main homepage screen. At the top will be the website you can give friends so they can visit the pages you create. Each site you create will have a unique address too. Under that will be a list of the different sites you have created. At the bottom will be the different templates you can use for your page. A template is the design and layout of the page.
For now, we are just going to make a page. so click the “Add Page†tab.

You will then be asked what kind of page you want to do, and what design, or template, you want to use. Down the left column are all of the different page types you can make. On the right are the templates you can choose for that specific page type. Make sure “Photo Album†is chosen.
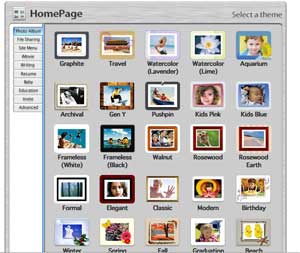
Pick a theme for your photo album and click it. Don’t worry, it isn’t set in stone. You can always change it later.
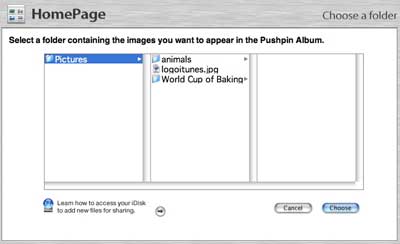
You will now be asked to choose the folder with the photos in it for that page. Click the folder you just loaded into your iDisk account, and click continue. .Mac will automatically take your photos and lay them out on a webpage using your chosen theme.
If you don’t like the theme, click “Themes†at the top of the screen to pick another one. This is also where you can choose if you want your photos in one column or two.

Your new page will have a lot of white boxes with text in them. This text is editable. You can delete the text, change the text, or leave it. The top text field is where you can title your page. If you have more than one album, this title will appear at the top of your page as a link to navigate between albums. The second text field is also for a title. This can be the same as the previous one, or a different one. Under this title is an area where you can describe what the album is about. Finally each picture has its own text field. By default, the photo’s filename is here. You can change it to whatever you like.
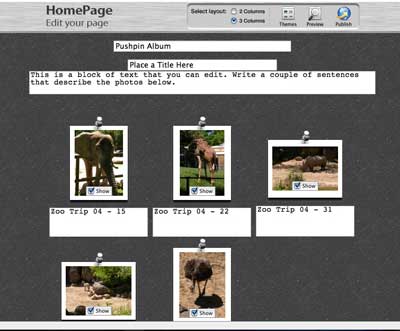
Each photo also has a check box called “Show.†Unchecking any of these boxes will leave that photo off the final page.
If you scroll down to the bottom of the page, you will find a few more options.

Here you can choose to show a counter on the left, and a “Send me a message†button on the right. The counter will show you how many times the page is visited. The message button will compose an email, for whomever clicks it, addressed to your .Mac email address.
At the very bottom are directions for rearranging the photos on your page. It is actually as easy as dragging a photo to where you want it to be.
Now that your page is done, you’ll want to publish it on the internet. First, it is a good idea to preview the page to make sure it is what you want. At the top of the page, where the column options and “Themes†button are, there are two more buttons. These are “Preview†and “Publish.†Click “Preview†to see what your page will look like. If you want to change something click “Edit†(previously the “Preview†button). If you like what you see click “Publish.â€
“Publish†will send you to a page with the web address of your new album. If you have more pages to make, you can click “Return to Homepage,†and start all over again.
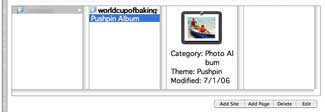
If you ever want to change something on the page all you have to do is go to the main Homepage site by clicking “Homepage†under the .Mac tab, as described earlier. Here you will see a list of all of your pages. Click the page you want to change and click “Edit†in the lower right. This will let you edit the webpage as I described above. You can also delete pages here by clicking the page and then delete.
Homepage is a great way to make photo albums and other pages with your .Mac account. It does not allow for as much customizing as iWeb does, but it is a great companion and alternative to iWeb.
Look for more articles about .Mac and iWeb in the future.

Leave a Reply
You must be logged in to post a comment.