Fun Photoshop Project #1
There are times when using Photoshop is simply a chore, and there comes a time when you want to get a little creative with a fun project. Here is a simple one, which will only take a few hours at most, but will have make people sit up and notice.
With three kids, it seems that my digital camera gets quite the workout. Between my wife and I, we are always taking pictures of the kids. Now that our two oldest, Brittaney and Raechel, are older and responsible enough, we allow them to use the camera at times as well. (Kids LOVE the idea of taking pictures. Send them outside for a half-hour with a digital camera with orders to take “Neat and interesting pictures†and they will have a ball!)
On a recent shopping expedition, I purchased three black 8X10 picture frames with the idea of printing out one picture of each child on some high-gloss photo paper and hanging it on the wall. But I wanted these to be different, so here is what I did.
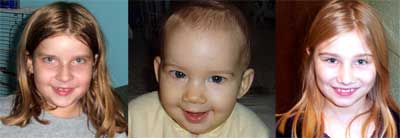
First, I selected three good headshots of each child, which you can see below:
Next, I opened each photo in Adobe Photoshop and cropped out as much as needed from each photo.

Time to add some effects!
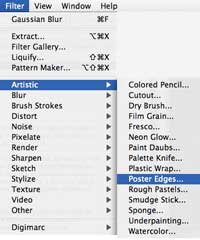
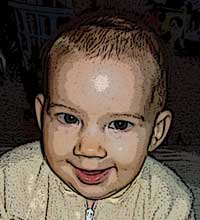
First, I choose Filter – Artistic – Poster Edges to create some nice black lines in the photo. This will help define what changes in the next effect we will apply.
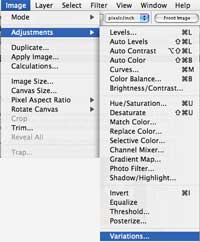
Now, I want each photo to have a strong one-color look to it. To get the look for each photo I want, I used Image – Adjustments – Variations and added a ton of Red. I changed colors for each picture, going with Green and Blue in the other two pictures. Once I have the desired amount, I move onto the next step.

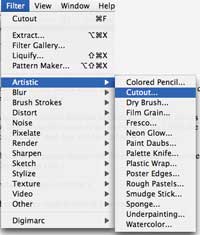
The last Photoshop step is to give each picture a cartoon-type of effect. To do this, I went to Filter – Artistic – Cutout and adjusted the options there to get the desired effect.

After repeating each step above for all three pictures, I loaded some high-quality high-gloss photo paper into the printer and printed each photo.
While the photos were printing, I borrowed some colorful construction paper from the kids. I selected a different background color for each photo. Then I ripped up some other colors to add even more color.
I then used stick-glue to adhere the torn construction paper to each background, creating a nice effect that will go good with the cartoon-style of pictures created above.
The last step is to cut out the headshots from the printed photos, and using the stick-glue, adhere them to the construction paper as well. Then simply frame each picture!
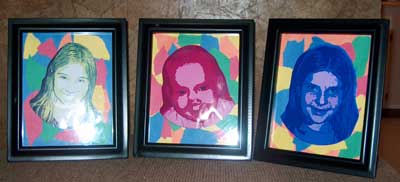
This is the finished project (sorry for the camera flash!) You would be amazed at how simple this project is, and how many people will comment on it once on display.
Here are all the materials you will need:
High-Gloss photo paper. (You can use a photo-matte paper as well, which may actually look better with the construction paper background.)
Multi-colored construction paper.
Stick-Glue.
Image-Editing software (Adobe Photoshop CE used in this project.)
About two hours of free time
Be creative! Have fun! And let us know your fun Photoshop projects!

Leave a Reply
You must be logged in to post a comment.