Fotomagico 4
Price: $99.99
Company: Boinx Software
Photographers like to show their work to people around them, and on the Internet. There are multiple ways of doing it, such as a web sites, image sharing, or social sites (Flickr, Google+, Facebook), but nothing comes close to a good slideshow. Read on to see how Fotomagico 4.6 can help you create good looking presentations.
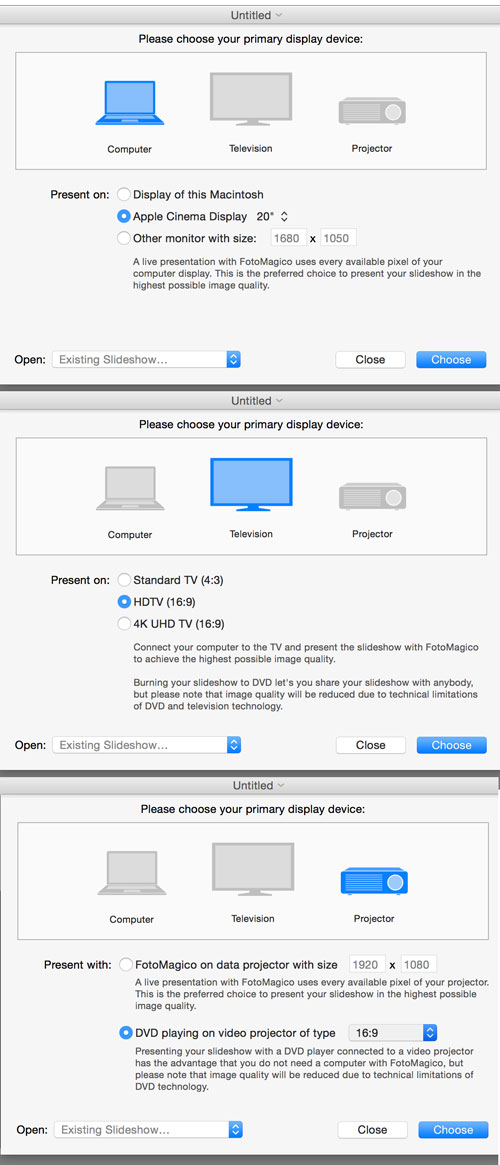
When you launch Fotomagico 4, you will be prompted by a template chooser for your project. You have three basic choices: Computer, Television, or Projector. In each tab, you can select from multiple sizes for the slides in your project. For instance, on the Television tab you have the choices for Standard TV (4:3), HDTV (16:9), or 4K UHD TV (16:9). Fotomagico 4.5 was released with support for 4K displays as its flagship feature. You can create a DVD slideshow if you choose the Projector tab. If you prefer to have a custom size, the last choice in the Computer tab lets you choose the size you want.
Once you select your template, you are presented with a window containing four parts. The main part of the window, called the Stage, shows two black squares named Start and Finish. At the bottom of the window, you have the Storyboard or Timeline. On the Sidebar on the right, you have the media libraries and folders. Last, you have the Toolbar between the top section and the Storyboard/Timeline where you’ll find the most useful functions to perform your workflow.
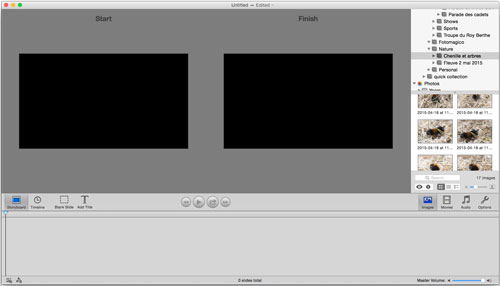
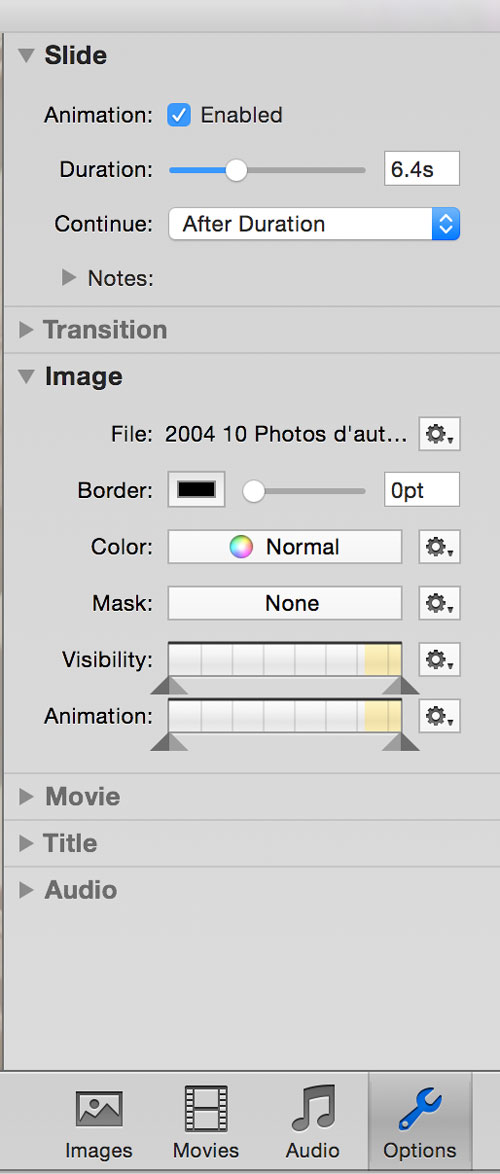
Working with Fotogagico won’t be too difficult for most people as it looks like an Apple built program. In the Toolbar, click on the Images button to show your picture sources in the Sidebar, then chose and drag the images you want to work with into the Storyboard. If you click on the Movies button in the Toolbar, you can add a video clip. Click the Audio button and select the music appropriate to your slideshow. The last button on the right, Options, lets you chose multiple parameters for the selected slide.
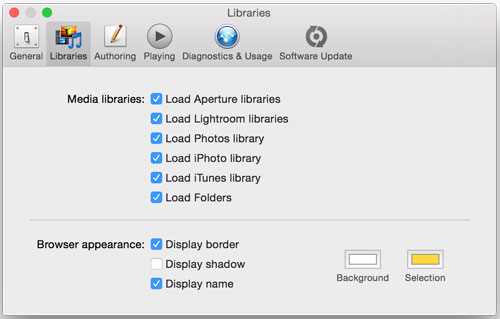
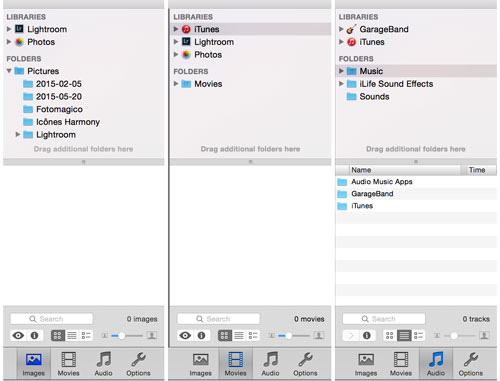
The beauty of Fotomagico is because it can automatically let you import photos, music, and video from where you expect them to be. When the Sidebar is showing the Images, you can see Apple’s Aperture, iPhoto, or Photos, and Adobe Lightroom under a LIBRARIES section of the Sidebar, assuming you are using them. If that is not enough, you can add a folder of your choice under the FOLDERS section of the Sidebar.
All three categories (Images, Movies, and Audio) have the same sections with their specific software and folders where applicable. For example, you’ll see iTunes under Audio and Movies, but not under Images. Note that iMovie and Final Cut Pro X libraries are not visible directly in the Movies Sidebar; you’ll have to export your clip to a folder to add them in your slideshow. In the Audio Sidebar, you’ll find GarageBand in the LIBRARIES section, and in the FOLDER one you’ll find the iLife Sound Effects system folder, which can be handy to add sound effects.
I’ll warn you about one thing for media libraries within Fotomagico: be aware of the versions of software you’re running. While I was testing the software, both Apple and Adobe released new software (Adobe Lightroom CC and Apple’s new Photos app). After I upgraded both of them, Fotomagico 4.5 became unable to access my Lightroom catalog, and did not show Photos at all. Luckily for the user base, the developers at Boinx Software were hard at work to release version 4.6 to patch those issues. It took only a few weeks to see a working library for both applications in the Sidebar again.
As a Lightroom user I contacted Boinx Software support for help and they provided a workaround for Lightroom that’s worth sharing. They suggested I create a Publish Services to a folder of my hard drive in Lightroom to export the images I wanted into my slideshow. By adding that folder into the FOLDERS section under Images in the Sidebar, I was able to continue my work.
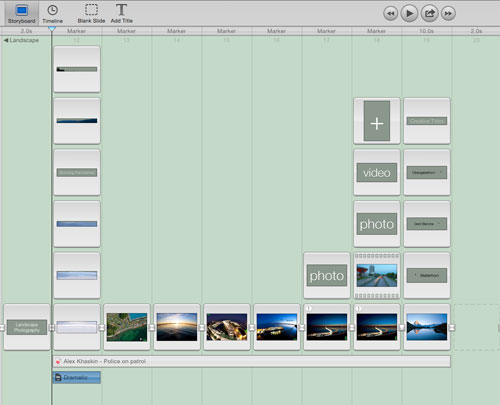
There are two main editing modes in Fotomagico: the Storyboard and the Timeline. They are very similar in essence, but have their own interfaces. The Storyboard shows your slides in an all-equal square boxes with your audio tracks below in a rectangle with the name of the track. The Timeline view shows the same information, but offers a better view of the length of each slide, and the audio tracks display the waveform. Most of the controls are similar in both modes, but each one has its strength. For instance, the Storyboard mode makes it simpler to rearrange your slides, while the Timeline offers you a better way to adjust the length of each slide by dragging the separator between two slides.
The Stage section of the window has a Start and Finish square with two knobs: Zoom and Rotation. You’ll do most of the fine tuning of the slideshow in this section. The Start square is where your image will first show when the slide appears on screen, and the Finish is how it will be shown at the end of that slide. In either square, you can chose the image position, zoom level, and rotation. You can also disable the animation within the Options section if you prefer. Then hit the Play button (or space bar) to see the result. Fotomagico 4 is a multilayer editor; you can have multiple images or music tracks/sound effect stacked one over the other in the Storyboard/Timeline.
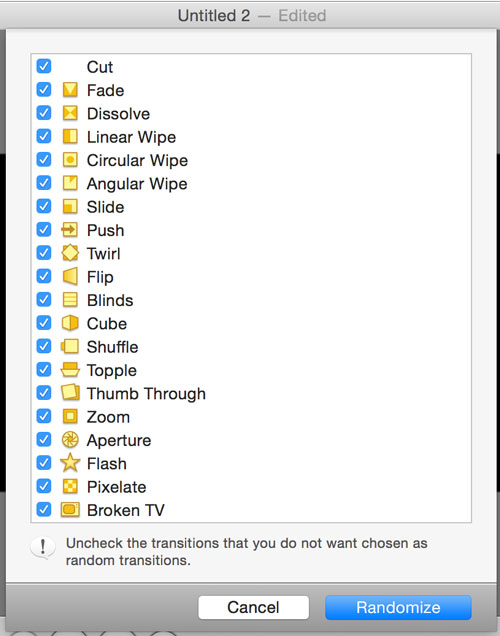
From here, you can really get creative, and create a stunning slideshow. The possibilities are almost infinite. If you take the time to work on your slideshow, you can make some works of dynamic visual and sound art. There are multiple transitions you can choose from; you can add titles and chapters; and you can sync the image transition manually based on the waveform of your music or let the software do it for you. There are so many options and settings you can choose in your slideshow that I cannot go through each of them in this review. There is enough material to write a complete book on Fotomagico.
All of these choices come at a price: the learning curve can be steep at first. To find out some tricks and tips, go to the File menu, and select Open Demo Slideshow. You will find an embedded slideshow that will show you a lot of what you can accomplish with the software. Click here to see the resulting slideshow. Boinx Software Youtube’s channel is a very good source of tutorial and demo if you are curious. You can download a demo version of the software to give it a try all by yourself on the software home page.
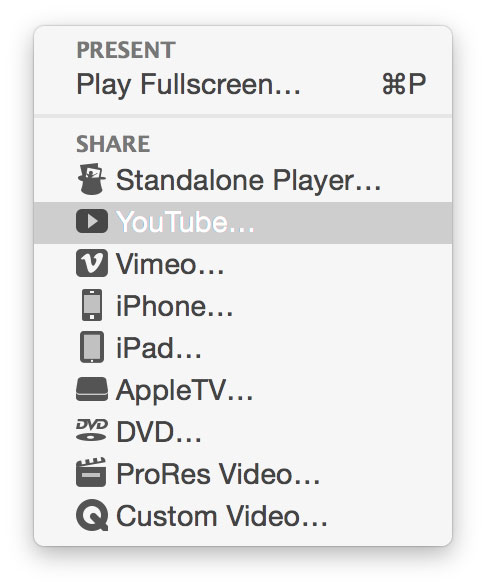
Once your slideshow is to your liking, you want to share it with the world. In the Share menu (or the Share button in the Toolbar) you will find many sharing options: DVD, YouTube, Vimeo, Standalone Player (a Mac application that can be run by anyone even if they do not have the software), iPhone, iPad, Apple TV, or a custom video format of your choice.
From start to end, Fotomagico will help you present your best images or videos to your audience with the best experience you’d ever imagine. It requires a small amount of effort to learn all the possibilities, but the reward is worth it. If you’ve been searching for a good slideshow builder for Mac, look no further than Boinx Software’s Fotomagico.
MyMac Review Rating: 9 out of 10





Leave a Reply
You must be logged in to post a comment.