Photoshop Lightroom 3
Company: Adobe
Price: $299.00 
Product Page
Have you ever had one of those, “game changer moments†when you sat in front of something and just said out loud or to yourself, “Oh My God� The first time I sat down in front of Adobe Photoshop Lightroom 3 (LR3), was one of those moments for me. There are many ways in which LR3 changes the content management game for photographers of all kinds and skill levels. Read on and discover if the improvements to this third generation of Lightroom are all that, or not.
OUT OF YOUR HEAD AND INTO THE WORLD
Adobe LR3 is a tool. Tools are what allow an artist to transform their artistic visions into a reality for all the world to enjoy. In many cases, an artist working with inferior tools will be limited by them. With that being said, the sky is the limit with Lightroom 3. It sounds strange to be having this conversation about a content management application. However, when you dig into the nuts and bolts of LR3, you soon find that this application is about much more than just managing your content.
As a child, I remember how I longed to grow and be more like my older, cooler (at least to a punk kid who didn’t know any better) siblings. LR3 has experienced a growth spurt so to speak. In this third iteration, the application has matured and now is beginning to resemble, in terms of its feature set, maturity, and productivity, its much older and acclaimed CS brethren.
Without question, LR2 was/is a great application and brought a number of great features to the photography world. However, IMO, LR3 has become as indispensable and critical to photographers as Photoshop. It is indeed, much more than just a content management application.
WHAT’S NEW
A number of the features covered within this review are not new to Lightroom. Features like noise reduction and sharpening have been available and useful within previous versions. However, for LR3, Adobe has gone back to the foundation of the application and rebuilt the image processing architecture which resulted in a new and dramatically improved RAW processing engine. In addition, Adobe has added another foundational core technology to the application, christening it, Lens Correction. There are other important features in this new version such as: accelerated performance, support for DSLR video files, Flickr integration, a more robust watermarking capability, tethered shooting, perspective correction, and many other improvements. Jump to the product page for more details regarding the new features in LR3.
BIT BY BIT
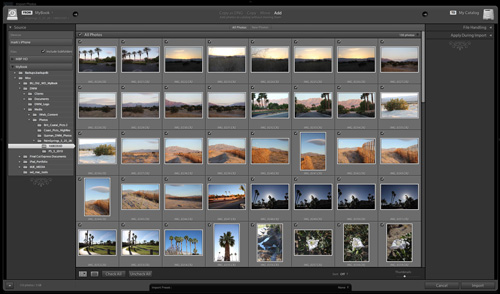
Accelerated Performance: I have always believed LR2 to be a peppy piece of software. Images open quickly. Preset and global changes are fast. Final image processing is reasonably quick. I have been content with the performance of LR2, and then I opened LR3 and imported my first series of images. I thought to myself as I looked and my images were just there, “Wait, did I open one of my catalogs?†Once I pointed the import screen (all new and very configurable — nicely done) to some 5D2 (Canon 5D Mark II) RAW images I had recently shot, the thumbnails just appeared as if they had been hanging around the either waiting for me to summon them. Having clicked “Import,†the actual images imported into the application very quickly, much quicker, seemingly, than LR2. Every area where performance could be optimized, seemed to be quicker. Screen changes and movements between views and panels were noticeably quicker.
Quicker performance was not implemented at the expense of fluidity. Everything was smoother and silkier in terms of the interface. Instead of just changing from one panel to the next, screen changes transitioned, very Appleesk.
Noise Reduction: “I’ll fix it in post,†has been the mantra of many O photographer, as they captured a lovely image only to find that it was unusable due to that pesky low light grain.
Photographers of the world unite in joyous elation! Start searching those archived images of yore. That beautifully composed once in a lifetime image that was too grainy for use, has now become your masterpiece. The new noise reduction capabilities in LR3 are nothing short of, to quote an oft used term, Magical.
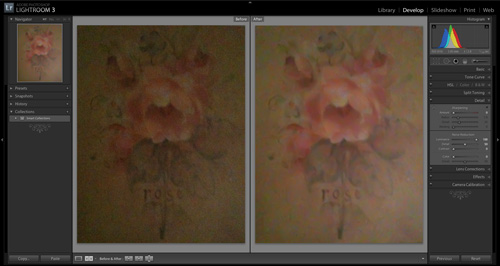
Most of my images of late have been captured on new cameras that employ very sensitive sensors and can capture beautiful images even in low light. So to test out the new noise reduction, I used the weakest camera in my possession, my iPhone 3G3, to capture an image in a low light situation. The image on the left is a cropped version of the original iPhone image. This grain in the left image is a worse-case scenario. It has basically rendered the image unusable. On the right is the cropped image with a slight exposure adjustment to make the changes more visible. Sliding the NR slider transformed this worse-case scenario into something usable. For those who were thinking they needed to spend a boat load of cash to upgrade to a higher end camera body for the higher ISO capabilities, think again.
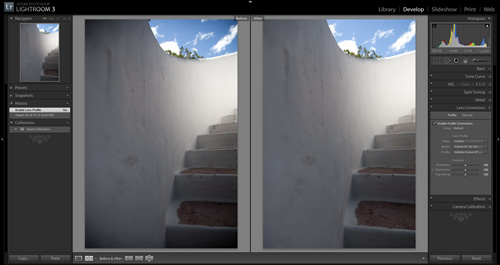
Lens Correction: Ok, I have to tell you about one of my OMG moments with LR3. After installing LR3, I opened the application and imported some new RAW images from a recent shoot I was saving for the review. So my images where there in front of me and the first thing I noticed was the vignetting in the corners of the images (see the corners of the left image).
I knew that Adobe had added a new lens correction capability into LR3 and so I just clicked on one of the images, opened the Lens Correction panel and enabled the technology for that image. As I looked at my image I was completely blown away. I said out loud, “Oh My God!†They (Adobe) had greatly simplified a process that normally took multiple steps within Lightroom, or the use of a plug-in, or roundtriping the image to Photoshop.
When I enabled the technology, Lightroom made the changes to the image based upon its knowledge of the camera and lens I used. This technology will save the average user a great deal of time within his/her workflow. In terms of productivity, this new feature alone is worth the upgrade price.
Perspective Correction: We have all captured images where we worried so much about composition that we forgot about whether all of the angles were lined up correctly. Sometimes, those angels are in the way and we make an artistic choice to skew them, or at least that is what we tell those who ask. Other times, we just forget to check them before we released the shutter.
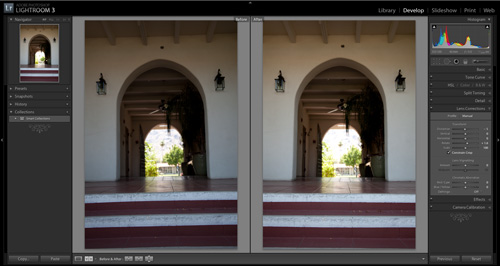
In LR3, Adobe has made it possible to go back and correct our mistakes through Perspective Correction. Located under the Manual tab within the Lens Correction panel, LR3 allows you to transform your image through the use of three dimensional adjustment sliders labeled: Distortion, Vertical, Horizontal, Rotate, and Scale. When your adjustments cause a portion of the image to gray, simply check the Constrain Crop option and Lightroom adjusts accordingly. In the above example taken on that same recent shoot, I was able to correct the perspective to line up all of the angles and restore the proper symmetry to the image. Once again, I adjusted the exposure to make the changes more visible.
Film Grain Simulation: One of the new effects available within LR3 is the ability to add simulated grain back into pictures. Yes, this is strange. After all, Adobe has went to great lengths to help us get the grain (from low light that is) out of our pictures.
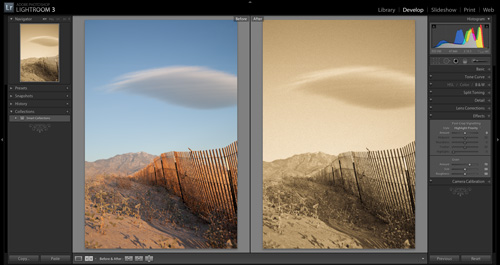
This is different. This is good grain, the kind we can control and add from time to time if the image dictates it. Located under the Effects panel, one can adjust the Amount, Size, and Roughness of the grain’s effect upon the image. This can be very useful for those images which cry out for that B&W aged look. The above image was taken during the now infamous recent shoot and presents a nice variation with the grain added. I changed the coloration in order to emphasize the aged look. This effect is a nice addition to an already strong tool set.
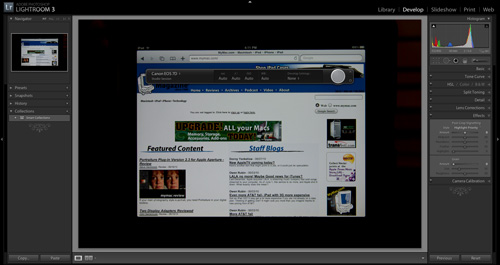
Tethered Shooting: Another new feature in LR3 is the ability to tether your camera to your computer and capture images directly into LR3.
This will be a great tool, in particular, for studio photographers who will be able to immediately view their images and make any adjustments in almost real time. Now imagine if you could use this and a few other features from LR3 on your iPad. Think of what you could do with Lightroom for the iPad. Tethered shooting via Apple’s Camera Connection Kit, a few of the features from the Library, Development, and Slideshow panels, this would truly be the, “Killer App†on the iPad.
MAKING A GREAT APPLICATION EVEN BETTER
There isn’t much to say regarding what I would change in Lightroom 3. As with every application, there are always ways to improve the product.
One suggestion would be to allow the preset preview window to display a real-time preview of the current preset being hovered over in Loupe View or the After pain of the Before and After View. This would allow a more detailed evaluation of the preset before actually selecting the preset and then having to undo the selection.
I know Adobe must be working on it already, but I have to say it, please develop a Lightroom App for the iPad!
MyMac.com Review Rating:
As always, it all comes down to this. To date, Adobe Photoshop Lightroom 3, IMO, is the best all-around content management and editing application for photographers. Indeed, there are other applications on the market which have, of late, come very close to Lightroom in some areas, but still lag behind in others. This new version of Lightroom widens the gap once more. Therefore, I am awarding Adobe Photoshop Lightroom 3 the prestigious rating of 9 out of 10 in our MyMac.com Rating System.

I’m a photographer that uses LR2 for now, and an upgrade to LR3 shortly. You bring up a good point about tethering to the iPad. Being able to show a client a larger image (from the iPad rather than the camera’s screen) right after being taken would be great. I wonder if a tether to the iPhone could be accomplished, now that would be really helpful for shooting away from the studio.